How & Why My Dakota Was Built
Great
Fourwheelers are BUILT - Not BOUGHT! |

Why I Made the Conversion on My Truck
I purchased my 1992 Dodge Dakota in April 1992, from Archer Dodge in Houston, Texas. I had just recently traded in a 1984 Jeep Grand Wagoneer for a two wheel drive, extended cab Toyota pickup. I liked the Toyota but hated the performance and wanted another four wheel drive pickup. I was impressed with the performance, the size and the looks of the Dakota.
The first fourwheeling I did with the Dakota was in November 1992 at Big Bend National Park in Texas. The truck performed very well but lacked the clearance to get over even small rocks.
I moved to Salt Lake City, Utah toward the end of June 1993 and got the truck stuck in a snow drift on top of a mountain the first week I lived here. The limited slip differential in the Dakota did not work as it was supposed to and never did.
 |
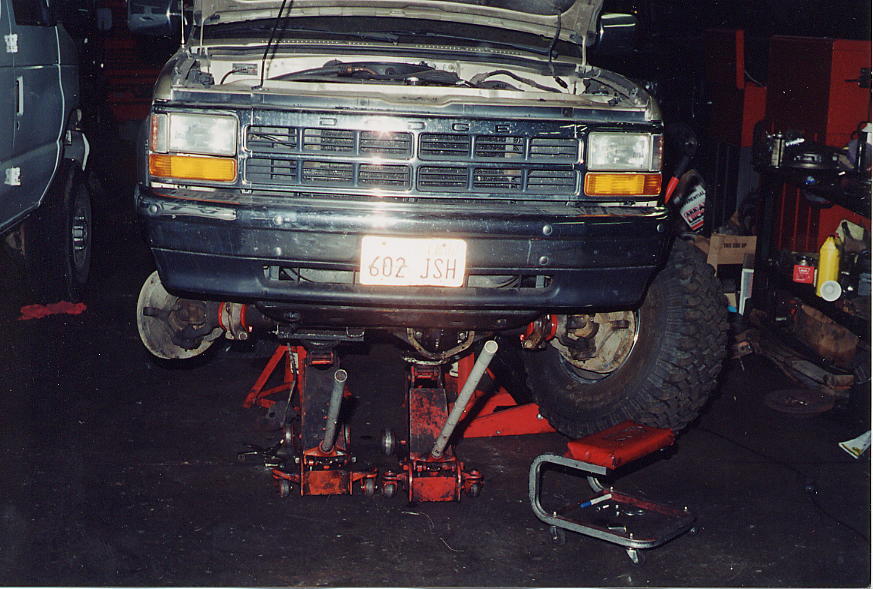
| The
Tuff Country Lift before it was ripped out |
One of the four wheel drive magazines did a Project Dakota and put a Trail Master 4 inch lift on the truck. The cost was restrictive for me at the time and I began to look around for other means of lifting my truck. I contacted Tuff Country in Salt Lake City and they were interested in prototyping a 4 inch lift for the Dakota and needed a truck to put it on. They took a week and built the lift from the ground up. I got the lift, four new shock absorbers and a lifetime warranty for only $350!
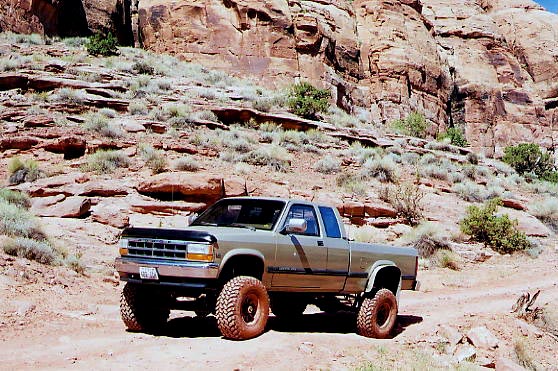
I put the suspension to the test and it performed very well. I took several of the trails at Moab during the Easter Jeep Safari. I also took the truck to the desert very many times and even drove over the extreme, Golden Spike Trail at Moab. I never once had a problem with Tuff Country's suspension and would recommend their products to anyone.
 |
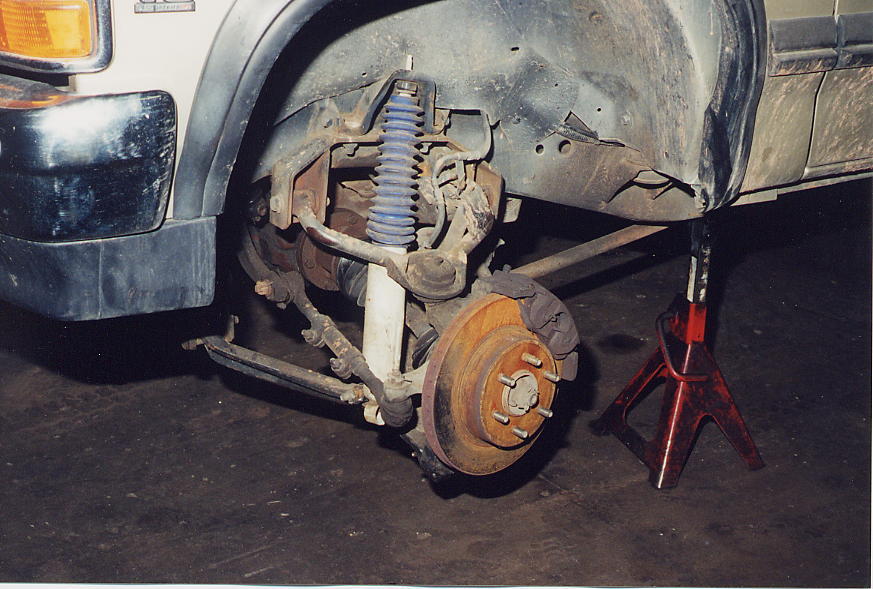
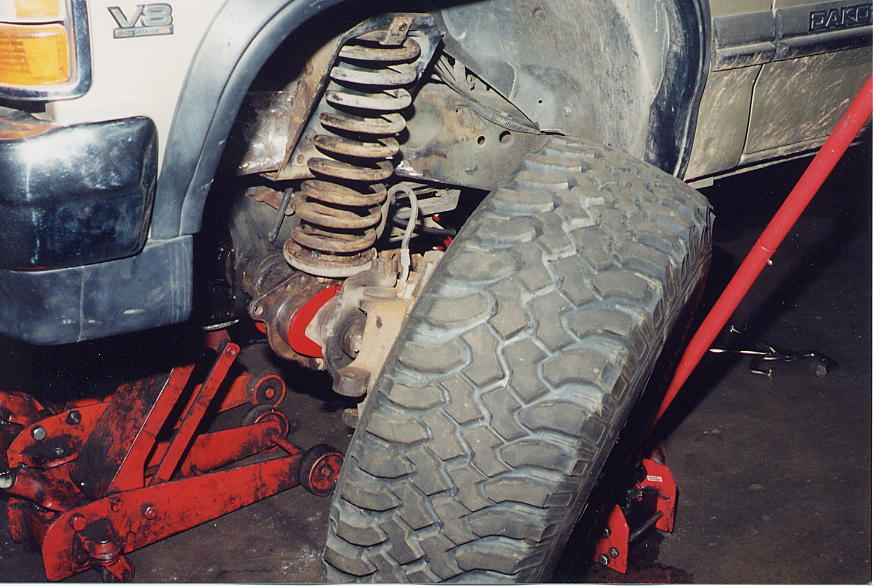
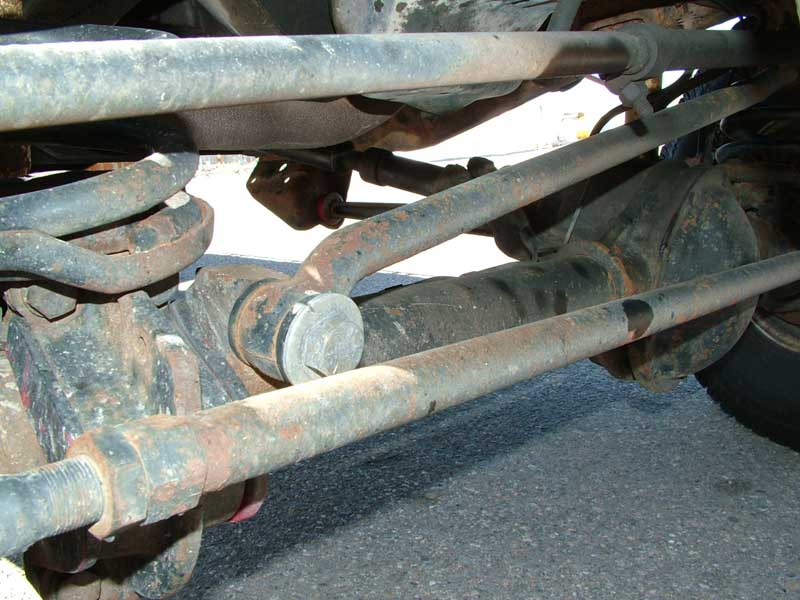
| Here
is the independent front suspension gone forever |
The problems I did have with the truck were in the front end. The small front differential that comes with the Dakota would just not hold up to the type of fourwheeling I do. I wiped out the pumpkin in the front end and paid dearly to buy a new one through Mopar since the parts are not available aftermarket. I can't fault Dodge for the problems I encountered because trucks are simply not built for this kind of abuse. I also broke the passenger side front axle on the truck and always had problems with the vacuum lines that engaged the four wheel drive. I was also constantly changing brake pads on the front of the truck because of the big tires.
I had seen several articles in four wheel drive magazines that talked about converting vehicles with independent front suspensions to solid axles but never saw such a system on a Dakota. I began to look around to see what type of equipment I could use to do that type of conversion on my truck. Custom built axles were just too expensive. With the front drive shaft coming out on the driver's side of the truck, the Ford axles would work in the Dakota. A
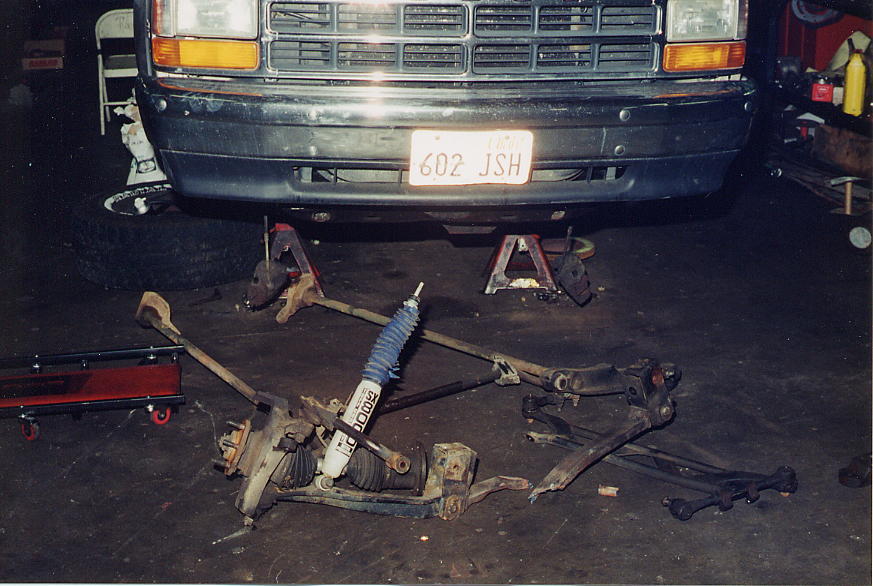
 |
| This
is what the axles looked like once they were taken off the Bronco
frame |
friend of mine at work had a suspension off of a 1979 Ford Bronco. His son had destroyed the body on the Bronco so my friend kept the frame and axles. I purchased the suspension from him and set it on the side of my house and dreamed about actually making the conversion. A few months after that, I returned from Moab, Utah and just as I was pulling in my driveway, my right front, lower A-frame broke. I couldn't even move the truck out of the street and had to call a wrecker to put it in my driveway until I could decide what I wanted to do. I was very fortunate that the A-frame broke there instead of on the freeway.
After weighing all the costs involved with repairing the Dakota, I decided to go ahead with the straight axle conversion on my truck. I had spoken to the people at Advanced Four Wheel Drive in Salt Lake City and they told me that I could bring the truck in, in about two weeks and they could do the conversion in ten days to two weeks.
 |
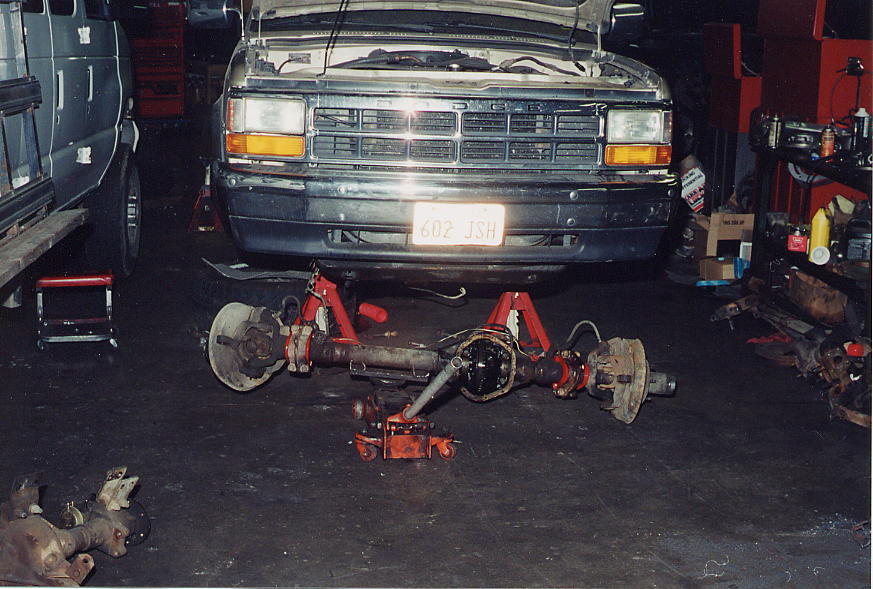
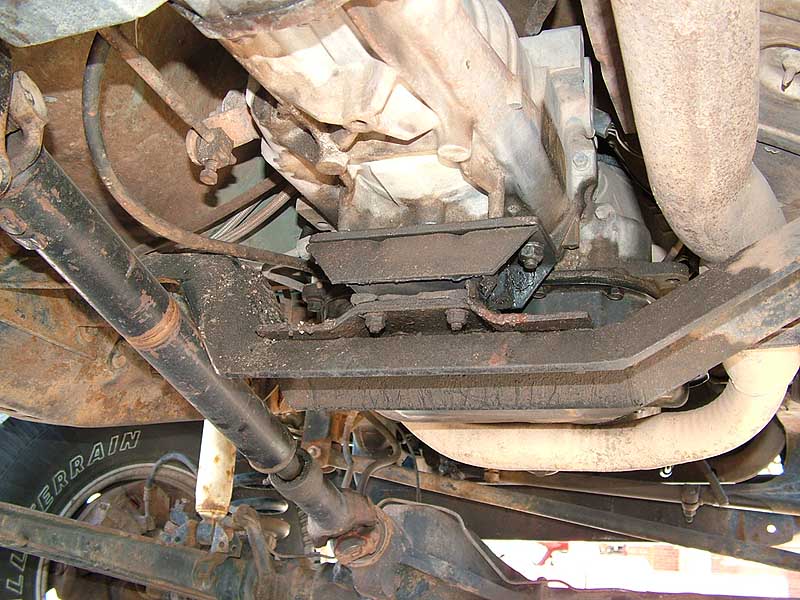
| The
brackets for the axle, shocks and radius arms are welded to the
Dakota frame, a perfect fit |
Seeing that the Dakota is my daily driver, I was in need of getting it back as soon as possible. I had a wrecker take the truck and the Bronco suspension to Advanced 4x4 for the conversion. They had done some other work for me and had always done a good job and their prices had been very reasonable. Well, things were different this time. Two weeks after I had the truck hauled to their shop it was still sitting in their lot and repairs had not been started. I called several other shops in town and no one wanted to try the conversion. I called Advanced 4x4 and told them I was going to send a wrecker after the truck because I had to have it for my daily driver. They got the truck in the shop that day and removed key components to the front end so I could not even have a wrecker pick it up. As I talked to the other shops in town I was told horror stories of others who had taken their trucks to Advanced 4x4 and it had taken months and one even over a year for one fellow to get their repair work done. I ended up going down to the shop every day that I could to try and rush the process along but to make a long story short, the conversion ended up taking all summer long, about four months from the time I had the truck taken in.
 |
| The
Dana 44 axle ready for installation |
When the conversion was completed, I was very happy with the results but very unsatisfied with the time it took and the stories I was told as to why it was taking so long. The conversion was completed toward the end of August 1999 and it has performed flawlessly. There are a couple of things I wanted to do but didn't at the time of the conversion. I had problems with stretching the chain in the NP 231 transfer case that comes stock with the Dakota. I thought about putting an NP 241 transfer case in the truck, thinking it would have a bigger chain but found out that it does not. Advanced Four Wheel Drive has a really good steering set up that totally eliminates bump steer but it leaves the tie rod below the front axle. I have bent the tie rod as a result of it sitting so low. I will have it relocated so it will set above the front axle. To do this, the holes in the steering arms must be reamed in the opposite direction and 1 ton ball joints used.
Details on the Conversion and Perfomance
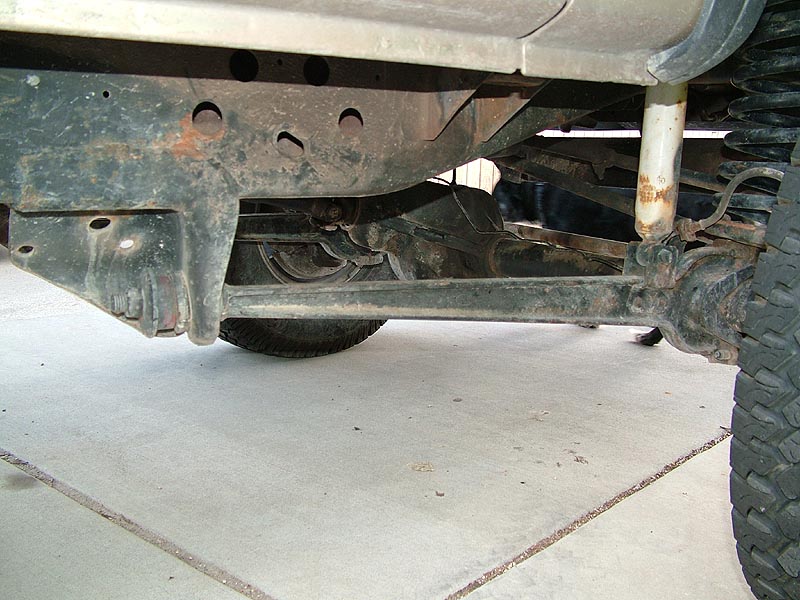
The conversion starts with removing the front axle and all mounting brackets. Use of a cutting torch or reciprocating saw is needed to remove the front cross member which, in my case, was already removed when Tuff Country installed the 4 inch lift on my truck. The rear axle is removed and the stock springs are used for the conversion.
 |
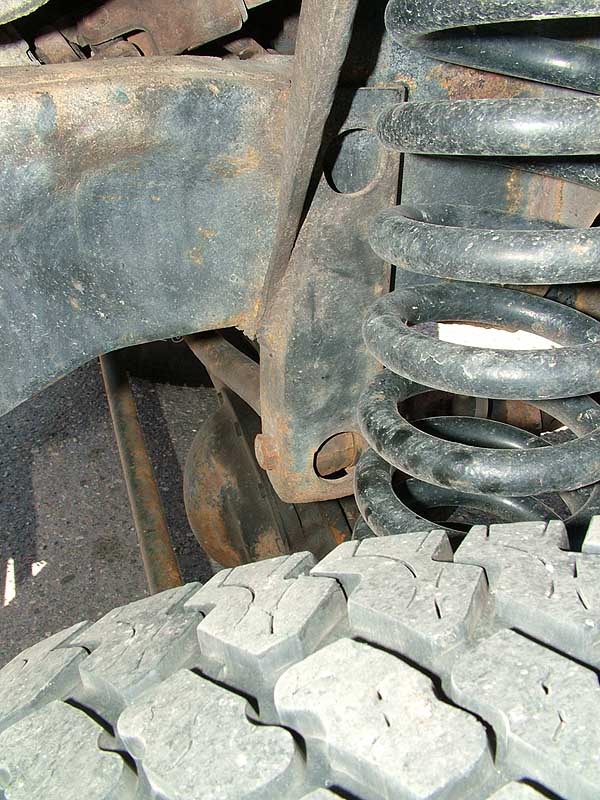
| A
closer look at the front axle |
One of the problems with running 33 inch tires is that they tend to rub when cornering. The rear of the front fender on the Dakota has a bolt that holds it on which makes it impossible to do much trimming on it. Because of this we decided to mount the new front axle one inch forward of its original location. If I was doing this again, I would go two inches instead of one. Once the location of the axle is very carefully measured, the spring brackets and shock brackets from the Bronco are welded into place on the frame. We used 6' lift springs from SuperLift. We originally thought we would have to use special drop brackets for the radius arms but it turned out that the stock radius arm brackets worked perfectly. Measurements were taken and they were welded into place. Then it's just a matter of bolting in the springs, front axle, shock absorbers and radius arms. The people at Advanced Four Wheel Drive said that we used the longest shocks available from Rancho. Anymore lift and we would have had to used some very expensive, longer shocks. The way the Dana 44 axle sits in the truck, required the front drive shaft to be cut down 1 inch and the u-joint ends had to be matched up to go from the Dodge transfer case to the Ford axle. We used the original steering box and steering shaft.
 |
| The
axle is raised into place then bolted in |
The spring pads on the rear axle were removed from the original axle and welded into place on the Ford axle. 4 inch blocks were used in the back, under the springs but the back end of the truck still sat too low. The rear spring shackles were turned over to give the additional lift to match the front of the truck. The original emergency brake cables were not long enough for the width of the new axles so new ones were fabricated and installed. We used the original Dakota driveshaft with a Neapco adapter u-joint to mate the shaft to the Ford axle. The shaft appeared to be about one inch out from where it used to ride on the spline. Advanced 4x4 seemed to think there would be no problem with this setup. This proved to not work so well. I noticed a severe bump under the truck when it would kick out of passing gear. I changed the transmission mount on the truck thinking it was broken but it wasn't. With the large blocks on the rear axle there is more of a problem with axle wrap. That is a situation when power is applied to the vehicle and the tires begin to roll, the axle wants to turn in the opposite direction which pulls the driveshaft spline out. Driveshafts are designed to handle a certain amount of this. The spline was coming out of the slip yoke far enough that it was binding when it would try to return to normal. This proved to have disastrous consequences when I powered up over some railroad tracks. The drive shaft blew out the end of my transfer case and broke the slip yoke on the driveshaft and the tail shaft on my transfer case. It also ripped out one of my emergency brake cables. I had been wanting to
 |
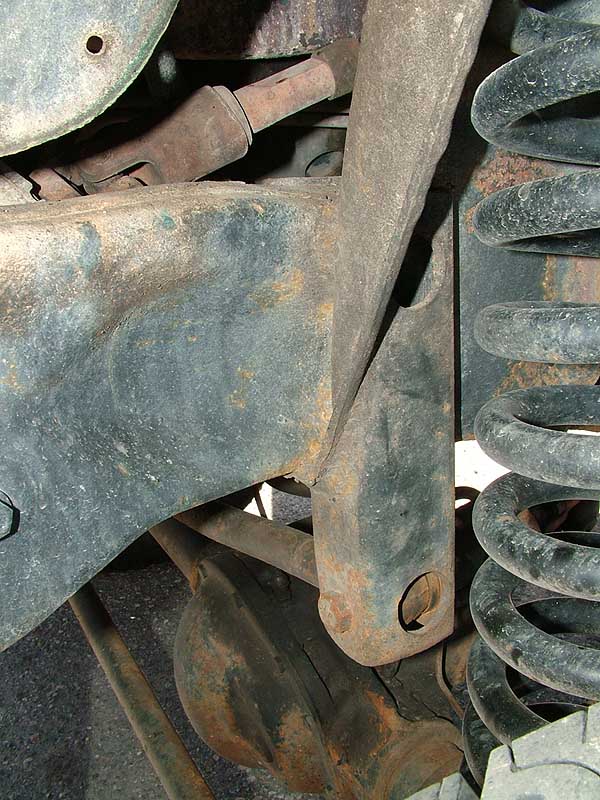
| A
closer look at the axle and spring installation |
install a slip yoke eliminator on my transfer case so, if I have rear drive shaft problems in some of the remote areas I frequent, I could drive home on front wheel drive without losing all of the fluids in the case. Normally, when the rear driveshaft is removed from a vehicle, there is no seal to keep the transmission fluid from running out the end. The slip yoke eliminator uses a seal and a flange that the driveshaft bolts too. When the driveshaft is removed, no fluid can leak because of the seal. Six States Distributors in Salt Lake City installed a Curry Slip Yoke Eliminator and installed a custom drive shaft in the truck.
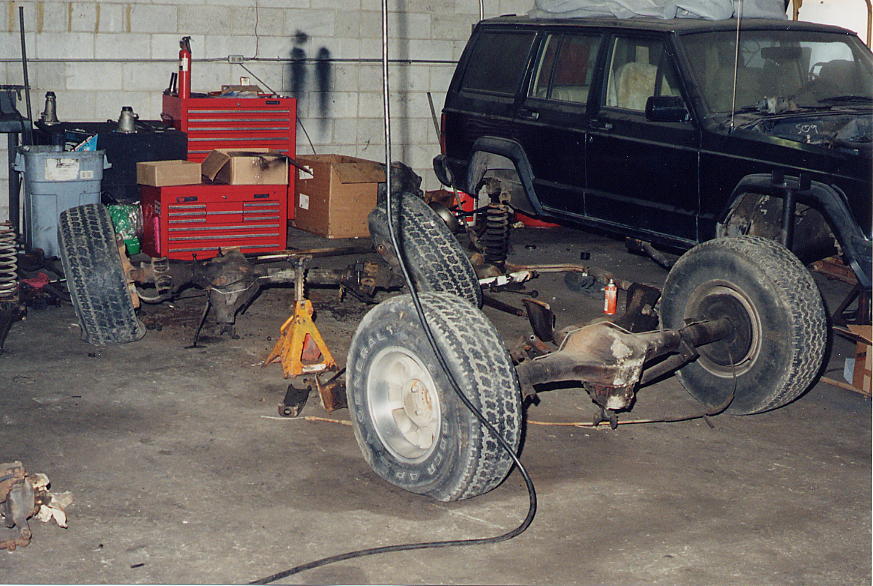
The conversion has proven to be very reliable and very stable. In fact, the way my truck is set up now is more stable than it was with the 4 inch Tuff Country lift. The tires stick out about 3 inches further than they did with the original suspension. I now have about 12 inches of lift over an original Dakota and never have to worry about the truck being top heavy.
 I
had ARB air locking differentials installed on the truck in May 2001 and
re-geared the truck from 3:50 to 4:11 gears. I had originally thought
about installing a Detroit locker in the rear and a limited slip on the
front of the truck. Since the truck is my daily driver and I drive on
ice and snow in the winter, I decided that I had better go with the air
lockers so I can use them when I need them and still have an ordinary
differential when I don't need them. Detroit lockers lock up when power
is applied to the axle. They are very reliable and very strong but take
some getting used to when driving in ice and snow and on the highway.
The ARB's are more expensive but give the driver the choice to lock up
the differentials when he wants to. I can't say enough about the performance
of the truck with all four tires pulling. Performance with the lockers
has been incredible. The kind of fourwheeling I do really requires the
use of locking differntials.
I
had ARB air locking differentials installed on the truck in May 2001 and
re-geared the truck from 3:50 to 4:11 gears. I had originally thought
about installing a Detroit locker in the rear and a limited slip on the
front of the truck. Since the truck is my daily driver and I drive on
ice and snow in the winter, I decided that I had better go with the air
lockers so I can use them when I need them and still have an ordinary
differential when I don't need them. Detroit lockers lock up when power
is applied to the axle. They are very reliable and very strong but take
some getting used to when driving in ice and snow and on the highway.
The ARB's are more expensive but give the driver the choice to lock up
the differentials when he wants to. I can't say enough about the performance
of the truck with all four tires pulling. Performance with the lockers
has been incredible. The kind of fourwheeling I do really requires the
use of locking differntials.
About
two weeks after having the ARB's installed, a trip was made to Moab, Utah.
Moab has long been known for its breathtaking scenery, extreme desert
and world class fourwheeling. We decided to take on Moab's hardest trail,
Pritchett Canyon. The Red Rock Four Wheelers club rates the difficulty
of the trails at Moab from 1 to 4+. A trail that is rated 1 is the easiest
of all the trails and the trails that rate 4+ are the most extreme. There
are many four wheel drive trails that range from 1 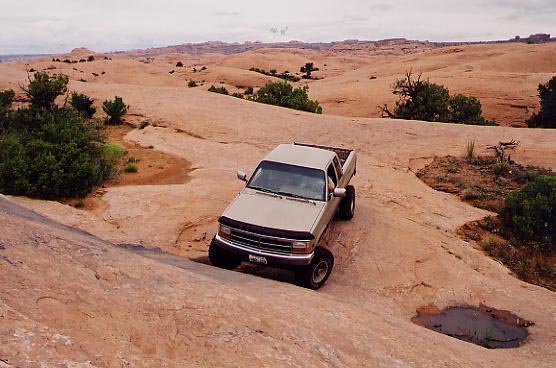 up
to the notorious 4+'s. There are trails for every range of vehicle and
driver. For the first time ever, at the 2001 Easter Jeep Safari, the Red
Rock Four Wheelers gave a trail a rating of 5. That trail was Pritchett
Canyon. The rating of 5 requires that each vehicle be equipped with locking
differentials, a winch and tow hooks on both sides of the vehicle, front
and rear. I do not have a winch but the Jeep that accompanied me on Pritchett
canyon does. We were also accompanied by three small quads. The Dakota
was VERY impressive. It was climbing every obstacle that Pritchett Canyon
had to offer. The Jeep had to bypass or had to be winched over several
of the obstacles that my truck went right over. The Jeep is equipped with
a limited slip differential in the rear and a locker in the front. The
Jeep is a very good fourwheeler and I've seen the driver do some incredible
things with it. I believe what really made the difference on Pritchett
Canyon, between the Jeep and the Dakota, was the length of the wheelbase
of each vehicle. The Dakota's longer wheelbase was a definite advantage
here. There are many times that the shorter wheelbase of the Jeep is an
advantage over the longer wheelbases of other vehicles. Each trail and
obstacle is different. I was able to climb everything on the trail and
then we came to the "Rocker Knocker". I had never seen such
a gnarly hill in my life. The trick is to get up the broken sandstone
ledges and make a hard left turn without having the awaiting boulder rip
out your driver's door or rocker panel. Each time I would try to go up
the obstacle my truck would slip toward the boulder. My door kept getting
precariously close to the boulder. I was not intent on driving home with
a huge dent in my door. I ended up coming up Rocker Knocker at a very
off camber angle which would not be possible by a lot of less stable vehicles.
I drove right up the obstacle to the amazement of everyone there. Most
people have to be winched up, as was the Jeep with us and even still,
he damaged his rocker panel.
up
to the notorious 4+'s. There are trails for every range of vehicle and
driver. For the first time ever, at the 2001 Easter Jeep Safari, the Red
Rock Four Wheelers gave a trail a rating of 5. That trail was Pritchett
Canyon. The rating of 5 requires that each vehicle be equipped with locking
differentials, a winch and tow hooks on both sides of the vehicle, front
and rear. I do not have a winch but the Jeep that accompanied me on Pritchett
canyon does. We were also accompanied by three small quads. The Dakota
was VERY impressive. It was climbing every obstacle that Pritchett Canyon
had to offer. The Jeep had to bypass or had to be winched over several
of the obstacles that my truck went right over. The Jeep is equipped with
a limited slip differential in the rear and a locker in the front. The
Jeep is a very good fourwheeler and I've seen the driver do some incredible
things with it. I believe what really made the difference on Pritchett
Canyon, between the Jeep and the Dakota, was the length of the wheelbase
of each vehicle. The Dakota's longer wheelbase was a definite advantage
here. There are many times that the shorter wheelbase of the Jeep is an
advantage over the longer wheelbases of other vehicles. Each trail and
obstacle is different. I was able to climb everything on the trail and
then we came to the "Rocker Knocker". I had never seen such
a gnarly hill in my life. The trick is to get up the broken sandstone
ledges and make a hard left turn without having the awaiting boulder rip
out your driver's door or rocker panel. Each time I would try to go up
the obstacle my truck would slip toward the boulder. My door kept getting
precariously close to the boulder. I was not intent on driving home with
a huge dent in my door. I ended up coming up Rocker Knocker at a very
off camber angle which would not be possible by a lot of less stable vehicles.
I drove right up the obstacle to the amazement of everyone there. Most
people have to be winched up, as was the Jeep with us and even still,
he damaged his rocker panel.
 |
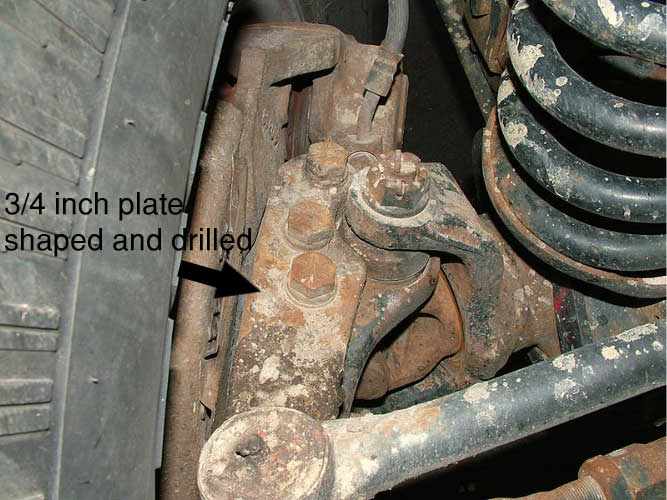 |
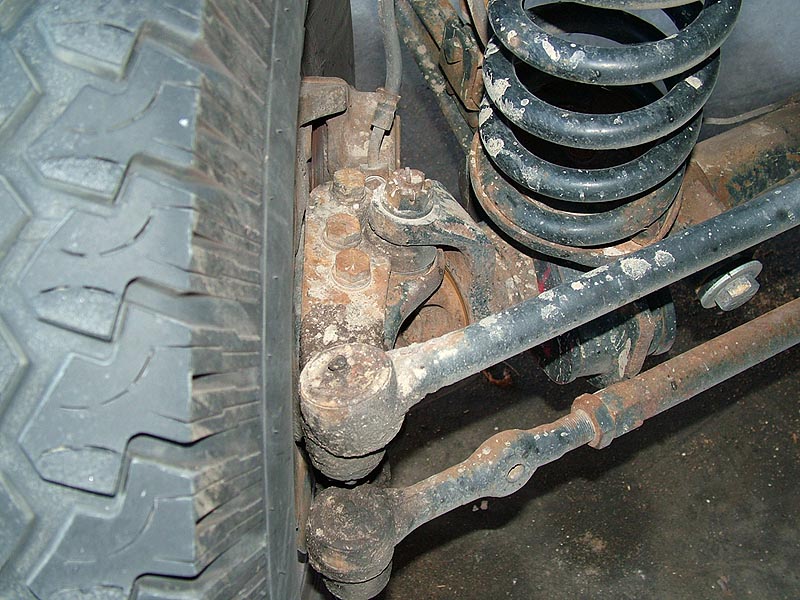
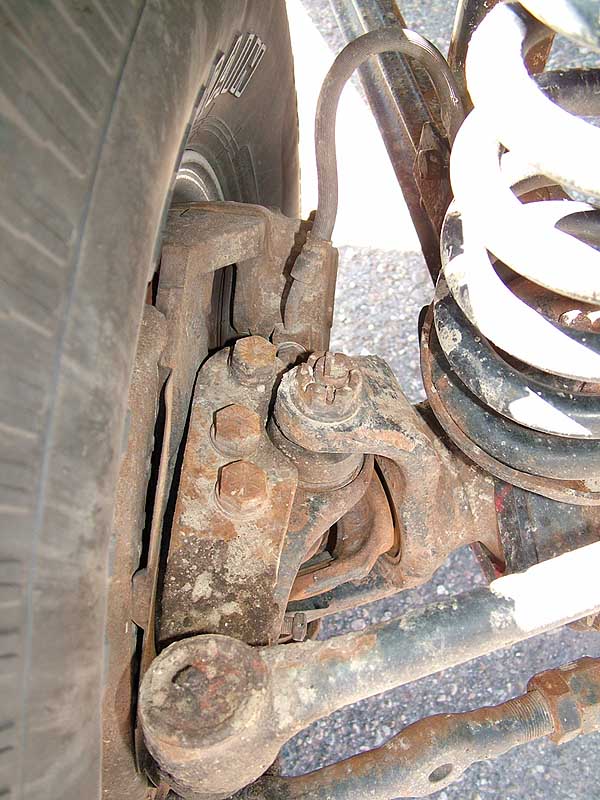
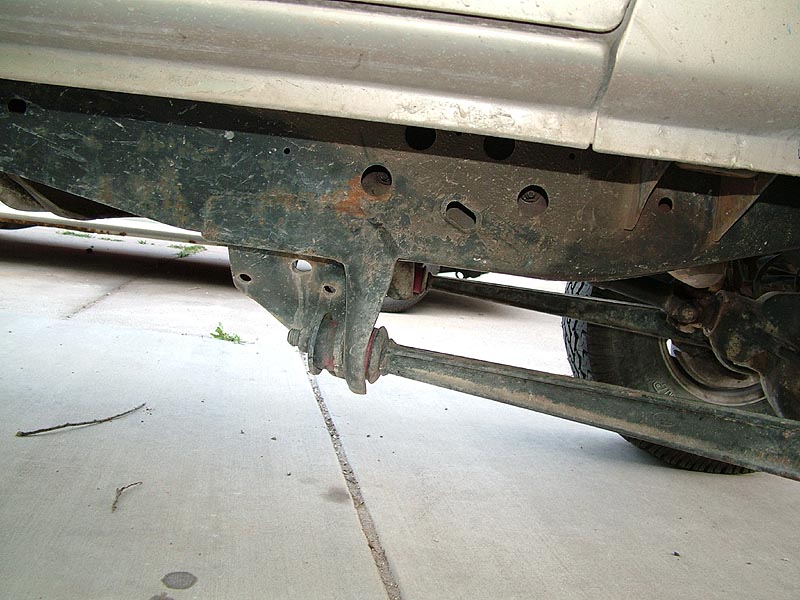
| The
steering setup on my truck uses a 3/4 inch plate that is bolted
to the steering knuckle. The knuckle is drilled and tapped first.
|
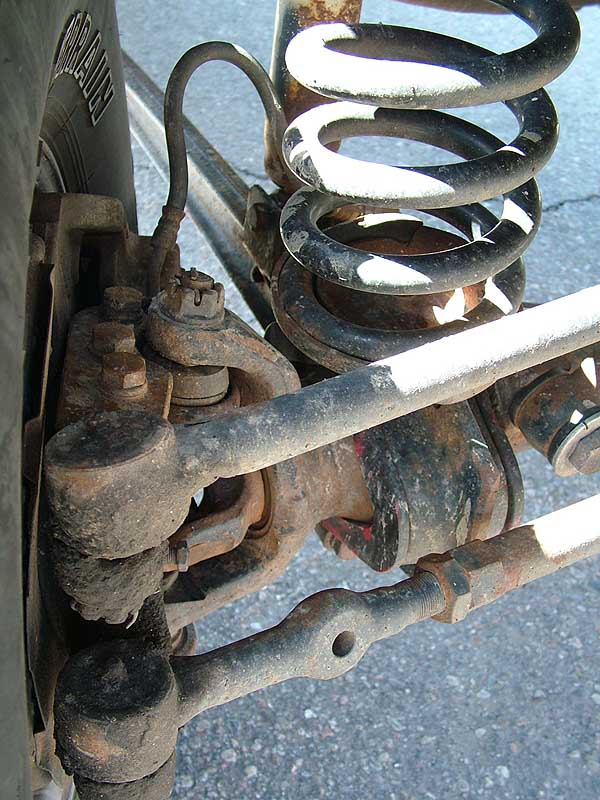
Here
is a closer view. The tie rod, visible in the other photos is flipped
on top with 3/4 ton ball joints. This keeps me from smashing the
tie rod. |
 |
 |
 |
 |
 |
 |
 |
 |
 |
 |
 |
 |
 |
 |
 |
The next obstacle was a solid rock ledge about four feet high. It is the last obstacle before the "Rock Pile", another well known obstacle to extreme fourwheelers. As I started up the ledge, I had a good line on it and was confident it would not present as much of a problem as the earlier obstacles had. Just as my front tires went over the top, my back tires slipped on the loose sand that covered the rock ledge, dropping the rear of my truck onto the frame and the rear driveshaft. The driveshaft was destroyed and it took us several hours to get it off the truck and winch it the rest of the way to top of the trail even though were probably less than a thousand feet from the top. The next morning, I drove to Grand Junction, Colorado in front wheel drive and had the fine folks at Driveline Services re-tube my drive shaft.
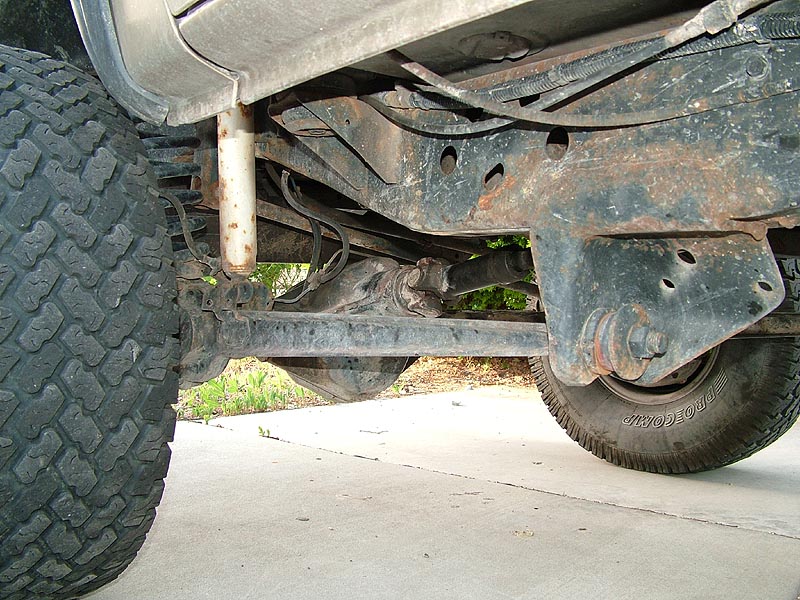
I have been very happy with this conversion and this truck will rival many of the best built Jeeps out there. The tie rod was severely bent on the trip up Pritchett Canyon. I had a new tie rod built and located on top of the axle instead of below it . So far I have not had any problems with this setup.
The prices (1999 $'s) for the conversion are listed below. If a person knows how to weld, he could save a lot of money.
| Cost of Bronco Axles | $500 |
| Configure and install axles, springs, shocks, driveshafts and emergency brake cables | $3500 |
| Miscellaneous parts | $200 |
| Curry slip yoke eliminator and new rear driveshaft | $600 |
| Warn Hubs | $60 |
| ARB locking differentials and air pump | $1500 |
| ARB installation and 4:11 gears | $1000 |
| Re-location and construction of new tie rod | $300 |
| Tie Rod Modification | $250 |
| Total cost of modifications | $7910 |
If you would like to do this conversion, I would be more than happy to answer any questions you might have.
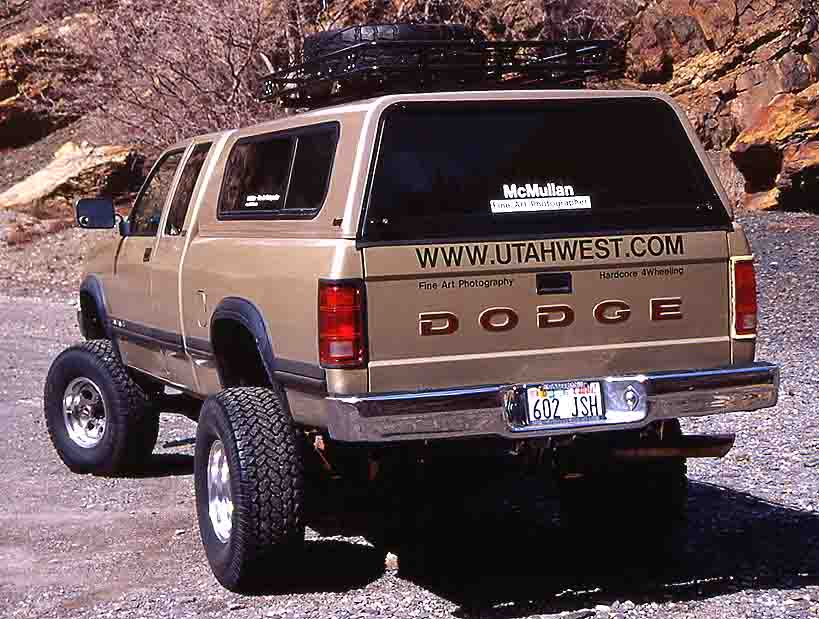
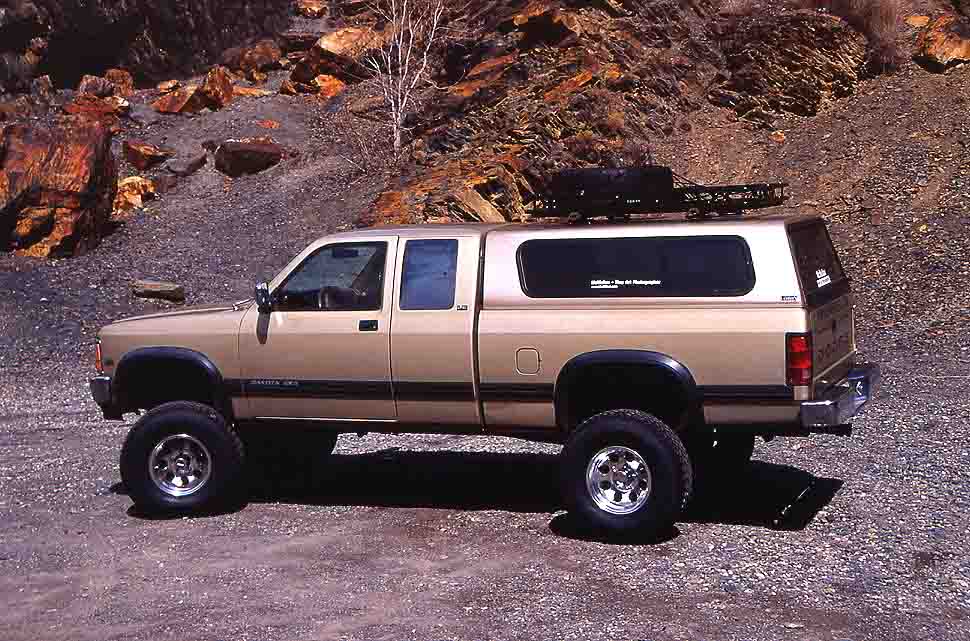
Click below to see larger images of my truck. These photos were taken in March 2003.
 |
 |
 |
 |