Guitar Construction
Page 2
Page 1 2 3 4
Tonight I am deciding how I am going to make the mold for my guitar. I have decided to make a solid mold as compared to a semi-solid mold. The semi-solid mold uses two sheets of plywood or mdf with wooden spacers spaced evenly around the perimeter of the mold. With the solid mold, I will use several sheets of mdf cut to shape.
To begin with, I will take the 3/8" Lexan pattern of the guitar body that I cut. I layed the Lexan over the full size drawings of the guitar body and traced the shape with a razor blade. Then I traced the location of all the braces on the guitar top. I cut to within about an eighth of an inch on the bandsaw and then used my oscilating spindle sander to sand the pattern to the exact shape of the guitar body.
Now that I have an exact pattern, I will use 3/4" mdf sheets that I had cut into 12" x 24" sheets. My guitar is 4 3/4" deep at the back so I will use 10 sheets total, 5 on each side. This will make my mold 3 3/4" deep.
|
|
To make my guitar mold, I begin by laying the Lexan pattern on to a piece of 1/2" medium density fiberboard. Then I take a brass router inlay kit and cut around the pattern leaving an intermediate pattern that is .19" bigger than the Lexan pattern. |
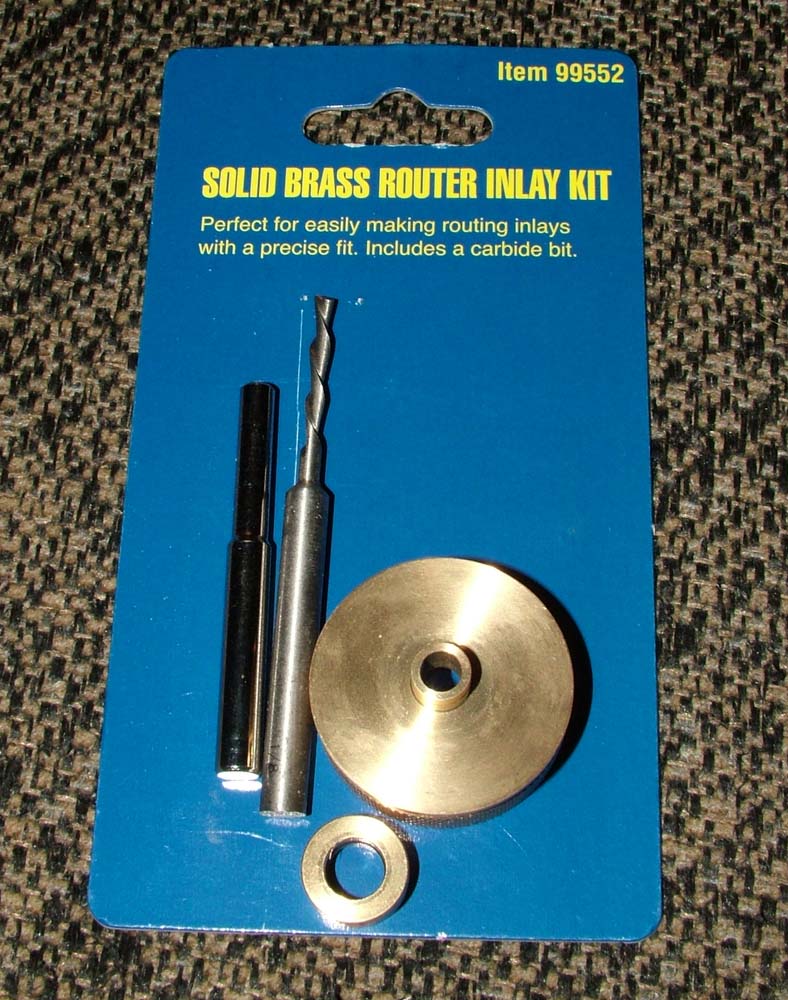
This is the router inlay kit. It comes with four pieces. A large brass ring with a small ring on the bottom. A snap ring/coller, a tool to make sure the brass ring is lined up properly and a 1/8" spiral downcut bit. The first cut on the 1/2" mdf is done without the smaller ring/coller on. This leaves an intermediate pattern that is .19" bigger than the original pattern. Then, using the intermediate pattern, the smaller ring/coller is snapped on and an exact pattern is cut. |
|
|
When I get the 1/2" pattern made, like this, I will trace pattern onto 10 sheets of 3/4" mdf. I will then cut up to 1/8" from the line and then use a router with a flush cut router bit to cut each piece to the exact size. Then I will join five pieces together for each side of the guitar mold. |
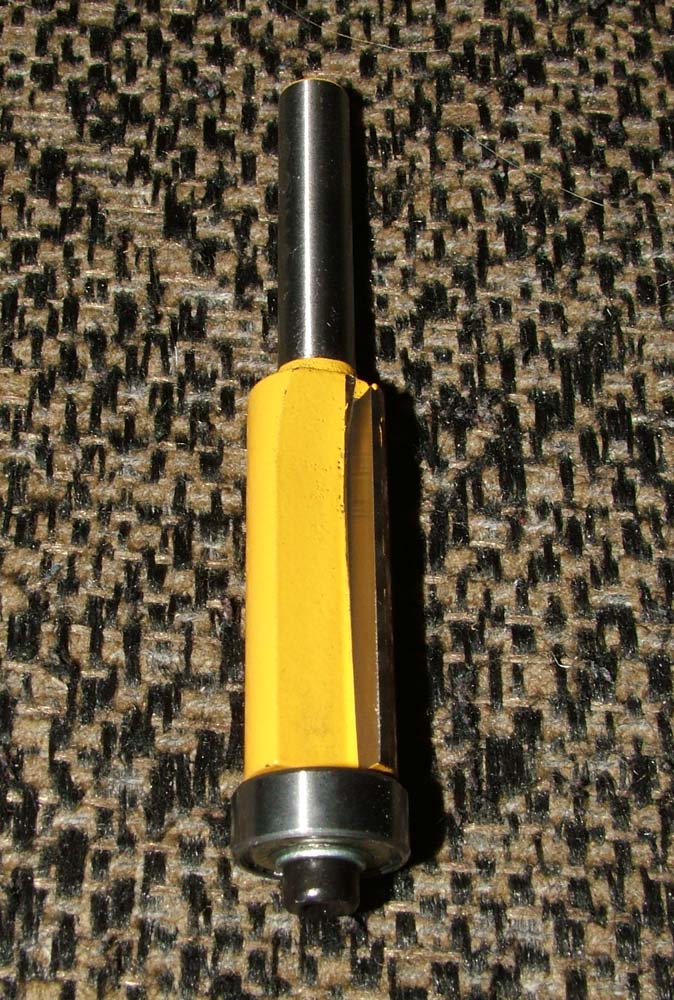
This is the flush cut router bit I will use to cut the 3/4" mdf after I cut it close with the bandsaw. The wheel on the bottom of the bit rides along the side of my 1/2" exact mdf pattern and cuts the 3/4" ply to the exact shape. |
|
|
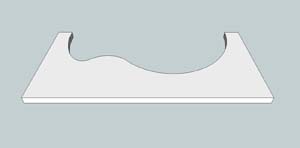
This is what each of the ten sheets of 3/4" mdf will look like. |
Five pieces of 3/4" mdf will be used for each side of the guitar mold. I will glue them together and use wood screws to hold them while the glue dries. |
|
|
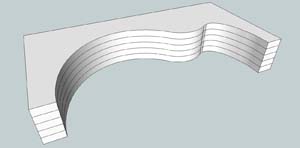
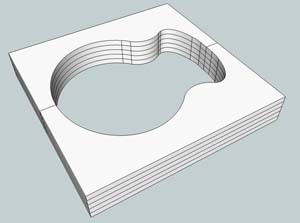
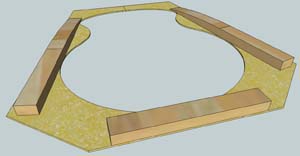
| This is what one side of the finished mold will look like. |
Here is the finished mold. I will use a 3/4" piece of plywood to make straps on the front and back that will keep the mold together while the guitar body is in place. |
|
|
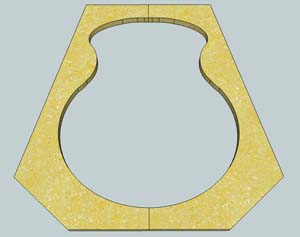
On the bandsaw, I'll trim the edges of each piece of the mold to make it lighter and to take up less room. |
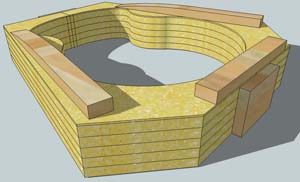
This is what the finished mold will look like with the end straps in place. If I can find some economical latches, I will use those instead of the wood blocks to hold the mold pieces together. |
|
|
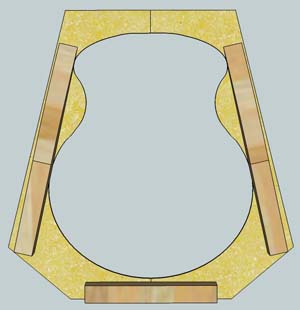
| This is a top view of what the side tapering jig will look like. |
Another view of the side tapering jig showing the staves on the side taper and will give shape to the bottom of the guitar. |
|
|
| This is a top view of what the side tapering jig will look like. |
This is a top view of what the side tapering jig will look like. |
|
|
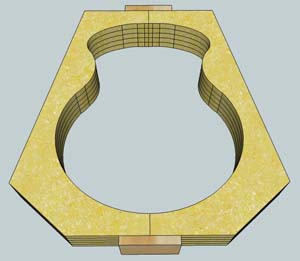
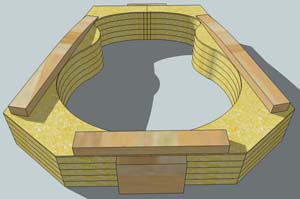
| The mold with the side tapering jig installed. This is the exact height or depth of the guitar. |
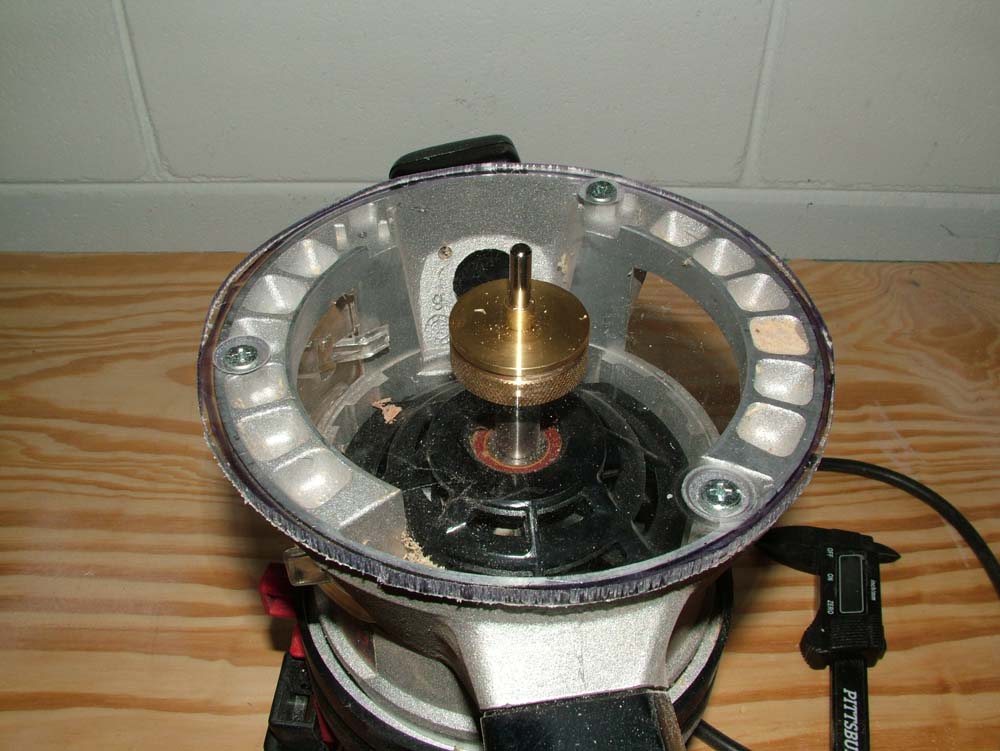
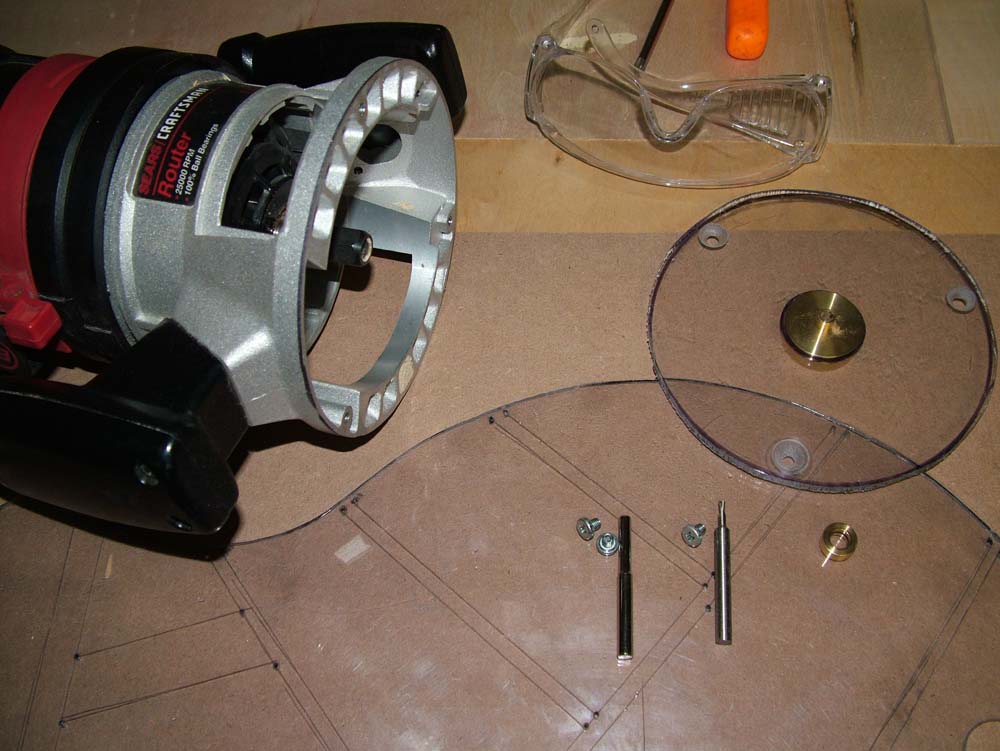
The solid brass inlay kit installed in the home made Lexan router base. The alignment pin is in the large part of the inlay kit. |
|
|
After I made about a 12" cut, the 1/8" spiral downcut router bit broke. That was the end of my work for the day. Here you see all the parts of the router inlay kit. The large part is screwed to the homemade router base. You also see the alignment pin and the broken spiral downcut router bit. ALWAYS wear eye protection when working with any power tools! |
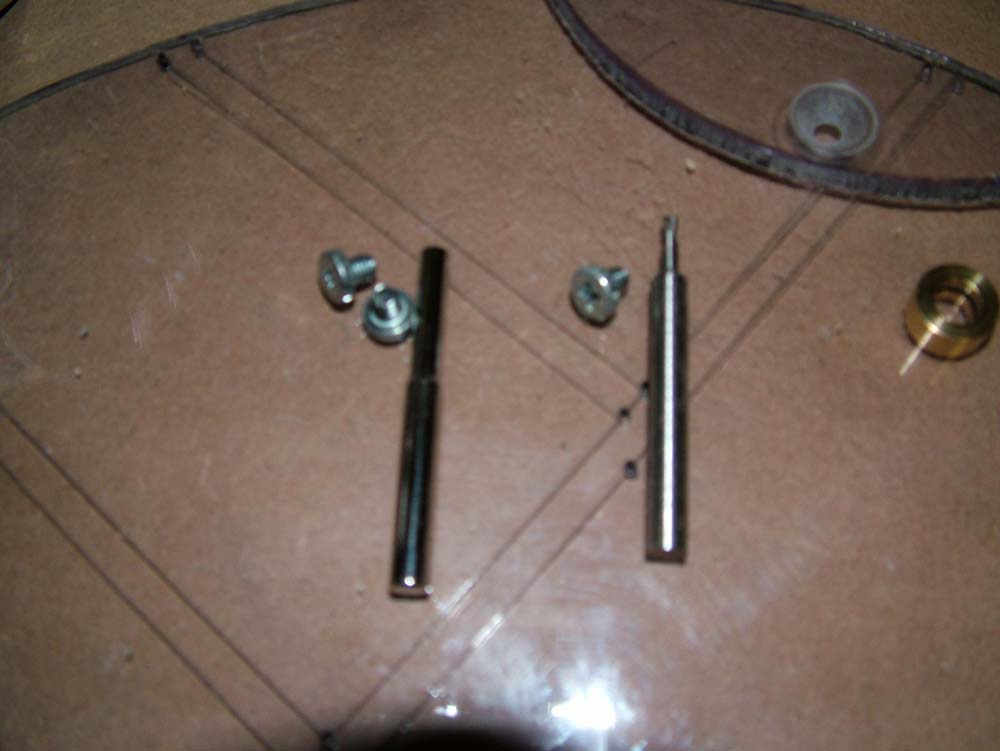
Sorry that this is a little blurry but you can see where the spiral downcut bit (on right) broke. I was cutting about 1/4" deep and was going to cut the intermediate pattern in two cuts when the bit broke. |
Before I cut the 3/4" mdf (medium density fiberboard), I will start by using a 1/2" sheet of mdf to make an intermediate form and then the final form. I will use a router with a brass inlay kit. The brass inlay kit has a 1 3/8" round piece of brass with a hole in the center. A spiral downcut bit fits through that circle and on the bottom of that brass ring, is another small ring that is .30" in diameter. That piece slides around the Lexan pattern which cuts an intermediate pattern .19" bigger than the actual size of the guitar. Then I snap a brass coller on that small ring on the bottom of the big ring and use the intermediate pattern to cut the exact pattern out of another piece of 1/2" mdf (see drawings for clarification).
Once I have the exact pattern, I will lay that out on my 3/4" x 12" x 24" piece of mdf and I will trace the pattern on the mdf. Then I will take the mdf to the bandsaw and cut it to within 1/8" or so of the line. Then I will use a router with a flush trim bit to cut the final shape in each piece of mdf. Then I will glue each piece of mdf together for each side.
Once the mold is made, I will make a side tapering jig to make cutting the shape of the bottom of the guitar. The bottom of the guitar is not flat but is slightly rounded. It tapers from the rear of the guitar toward the front and is rounded from side to side.
To make the side tapering jig, I will cut two use my intermediate patterns I made earlier to cut two exact patterns from 1/8" plywood. The mold I am building is exactly one inch shorter than the depth of the guitar so the I will cut two tapered staves will make up the thickness of the guitar. When the guitar body is placed in the mold and the side tapering jig is placed on the mold, I can trace the pattern of the guitar on the guitar sides and then cut and sand them to the exact shape.
I really like to lay all this out on AutoCad and Google Sketchup so I can think it through before I acutally start cutting any wood. If I can build a part for the guitar in my head first, it will ultimately save me more money and save me time when it comes down to building my guitar.
I couldn't sleep last night so I thought out all of the above and drew it on the computer and this afternoon, I got out in the garage and wanted to begin building the guitar mold. I ordered the wood for the back and sides of my guitar and it will be here soon. I want to be able to get started on it as soon as I get the wood and I need to have the mold ready. I wasn't sure exactly how to use the brass router inlay kit and as I looked at it, I realized that the Lexan router base I built a few weeks ago would not work. I cut a hole in the bottom that the large round piece on the inlay kit would go all the way through. Instead of that, the large round piece has a screw on part and that all has to screw onto the router base. So, I cut another piece of Lexan and drilled a one inch hole in the center. The large piece of the router inlay kit needs a hole just slightly larger than 1" so I used my spindle sander to enlarge the hole. This worked out very well.
I got my 1/2" mdf ready and when I started to clamp the Lexan pattern of the guitar body to the mdf, I realized that there was no way to clamp it where the clamps would not interfere with the routing operation. I took the Lexan pattern to the bandsaw and cut off about 1/3 of it lengthwise. This way I could clamp it to the 12" x 24" piece of 1/2" mdf without any problem.
I was going to cut the intermediate pattern in two passes of approximately one quarter inch each. I got about a twelve inch cut made and the spiral downcut router bit that comes with the router inlay kit broke! I called my local Lowes and Home Depot and they don't carry the bit. I called Harbor Freight and they don't have the bit but they do have more of the router inlay kits. They were only going to be open for fifteen more minutes and I am going to be there tomorrow so I gave up for the night. Tomorrow, I will buy another brass inlay kit so I can get the router bit and will finish making the intermediate pattern and then the exact pattern.
The brass inlay kit is available through Woodcraft for about $40 but you can get the same thing through Harbor Freight for $9.99. I'm all about saving money where I can. If you get the part through Harbor Freight, follow This Link for part number 99552.
|
The mold with the side tapering jig. |
|