Building Clamps
|
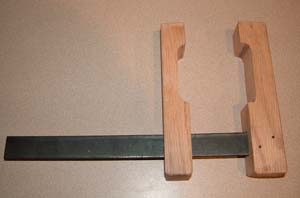
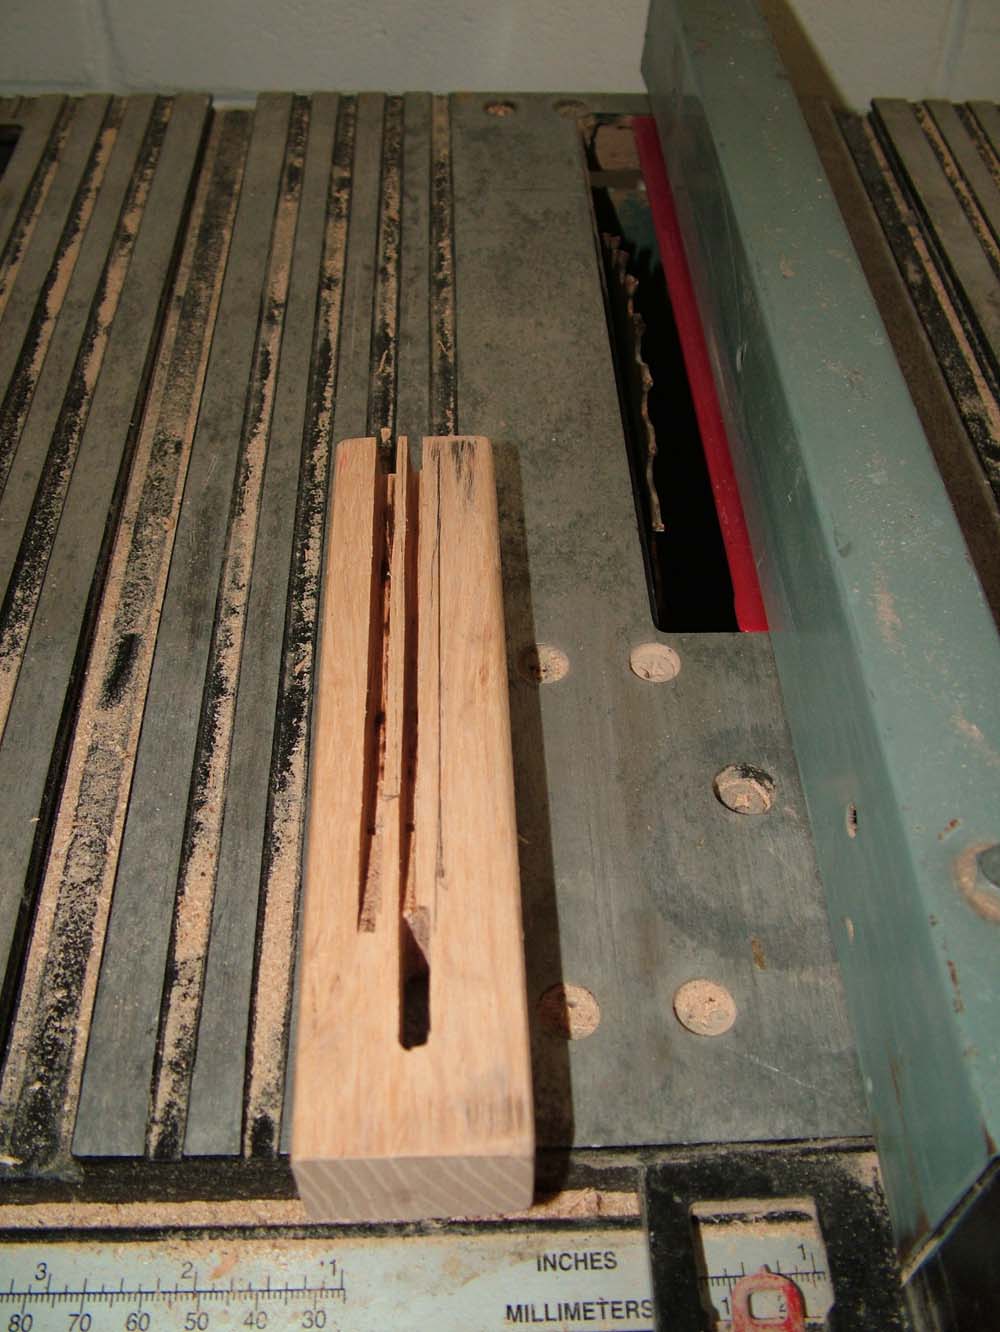
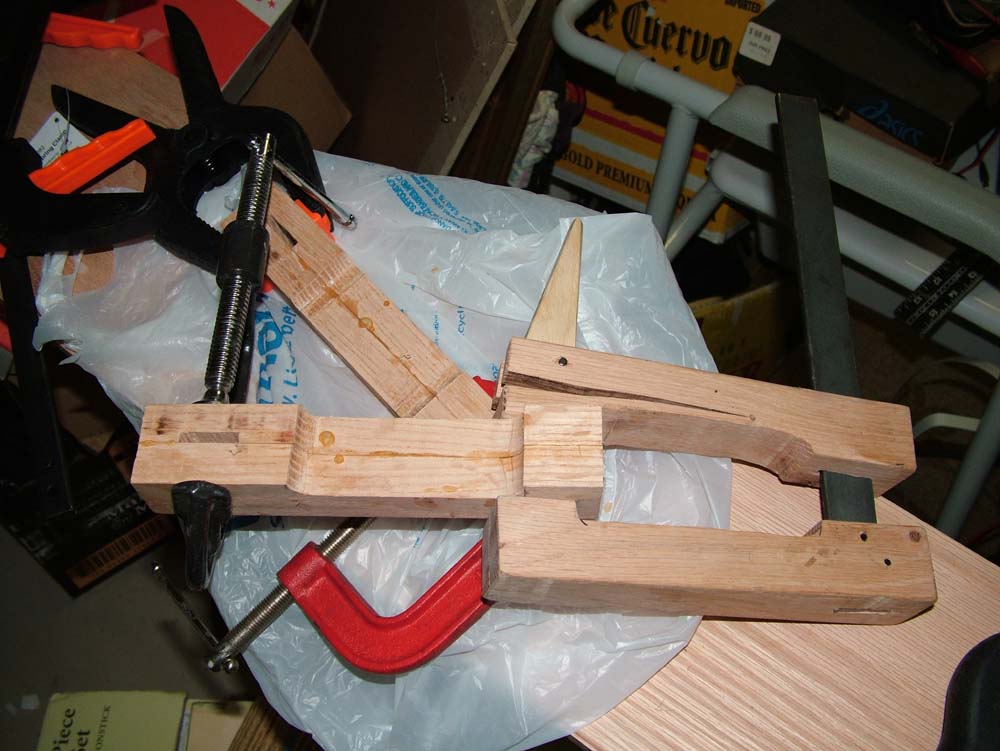
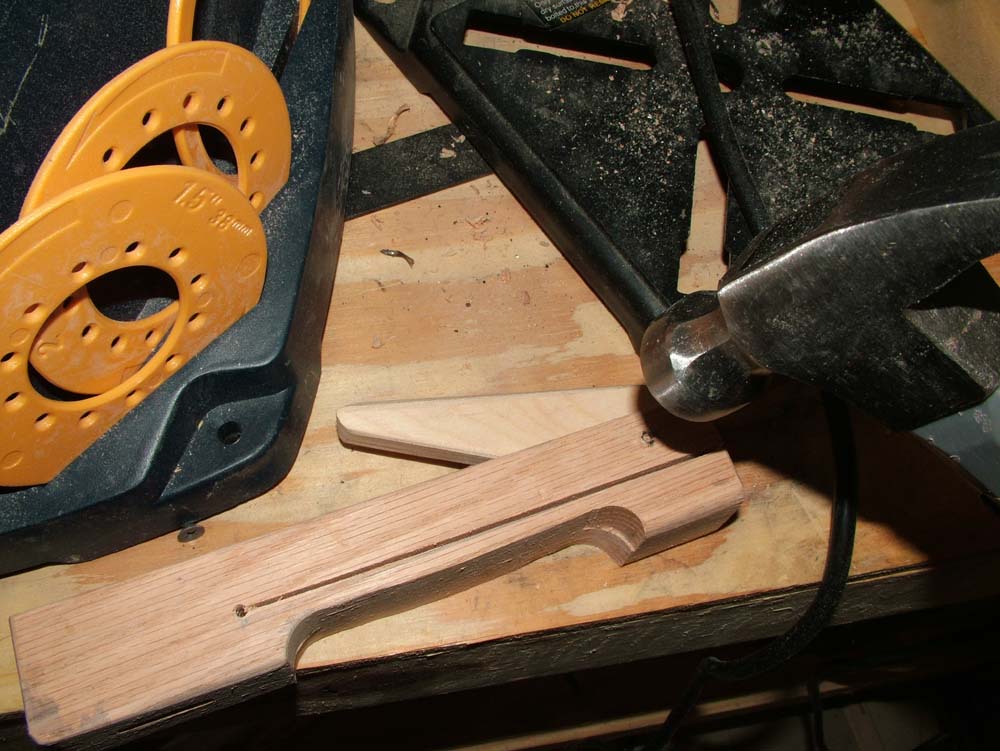
This cam clamp is not completed. I still have to add the cam and cut the slot for the wood to move to clamp as it should. I also have to drill holes in the wood and steel and install roll pins. Once it is finished, the block on the right will be fastened to the steel rail. The block on the left slides up against whatever you want to clamp and a cam will be rotated that will make the clamp squeeze whatever it is holding. |
To build a guitar, I am going to need clamps and lots of them. There are many different types of clamps and many of them can be bought but half the fun of building a guitar is building a lot of the tools to build a guitar. One type of clamp that a luthier needs is a cam clamp. A cam clamp can be built out of any hardwood and can use a rail of steel, aluminum or wood. My clamps are made from two layers of 3/4 inch oak with 1"x3/16" steel. My first clamps are 7 inches tall with a steel rail of 12 inches. You can build these to any size you want.
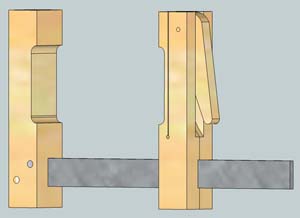
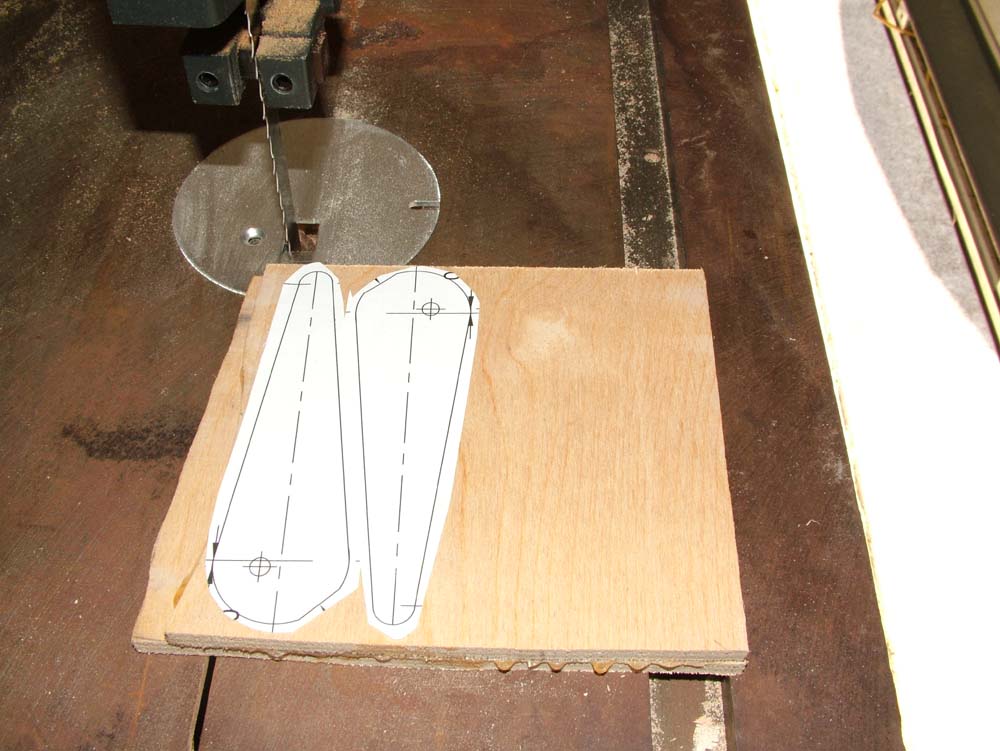
When I cut my first wood for a cam clamp, the alignment on my bench was off by quite a bit. The back of the saw blade sat off from the front of the blade by about 1/4 inch. Needless to say, that didn't make for very good cuts. I was able to clean the wood up enough that I can use the blocks and make a clamp. Now that I have my saw set up, the other clamps will look much better. In Figure 1, you can see how the clamp will push the tang on the block to fasten the clamp.
To build a guitar, I will also need an assortment of C-clamps and other woodworking clamps.
I have included a .dxf file for the cam clamps I am building for my project. There are other ways cam clamps can be built but this is the way I chose to build mine.
|
Building an acoustic guitar and the tools needed to build one will require different kinds of clamps. Here are an assortment of wood clamps. |
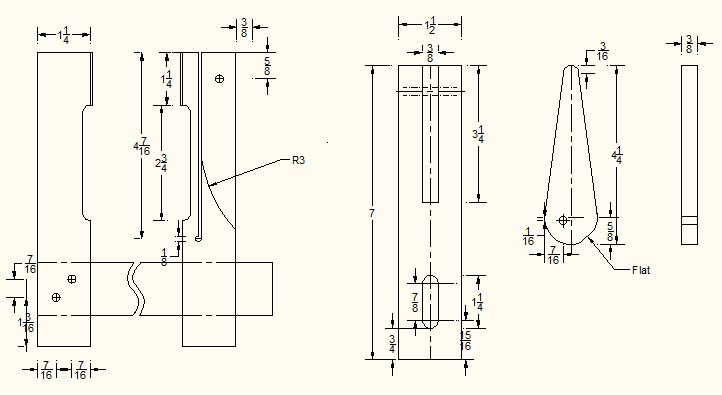
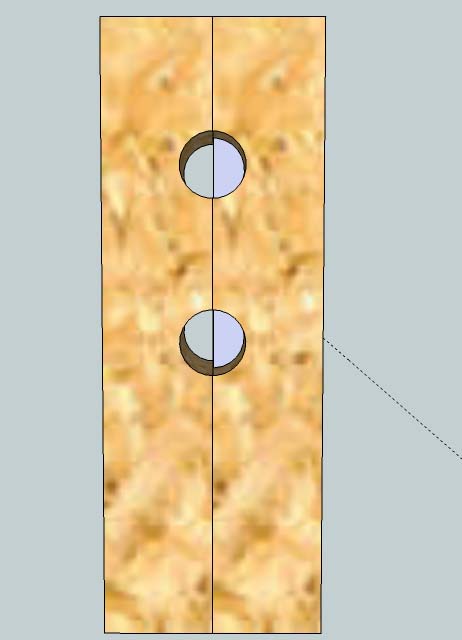
Here is a drawing of the cam clamps I am building. If you would like to have a .dxf file, CLICK HERE.
To get the Google Sketchup drawing, CLICK HERE.
|
|
This is a cad drawing of the cam clamps I am building. You can modify these any way you wish. I drew these and you can use these for your own personal use. Please contact me before sharing on other websites so I can make sure you have the latest drawing..
|
Here is a drawing made in Google Sketchup of a cam clamp. Click to download the Sketchup file. |
|
|
Finally, I got my first cam clamp built. It isn't quite as pretty as I would like but it works just fine. Once I get my table saw lined up and get a rip fence set up on my bandsaw, they will look much better. Now, about 19 more to go! |
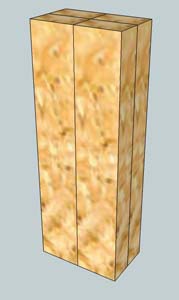
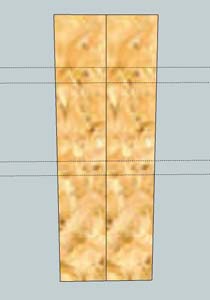
I start building cam clamps by clamping together 4 pieces of oak, 3/4"x1 1/4"x7". |
|
|
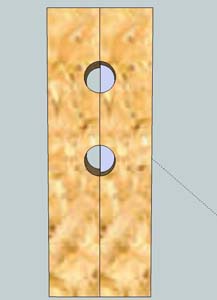
Draw a line 1 1/4" from the top and 4" from the top. Draw a line 3/8" inside those lines and then drill a 3/4" hole on the inside linesi in the middle of the blocks. |
Drill both holes and then cut out the space between the holes in each block. |
|
|
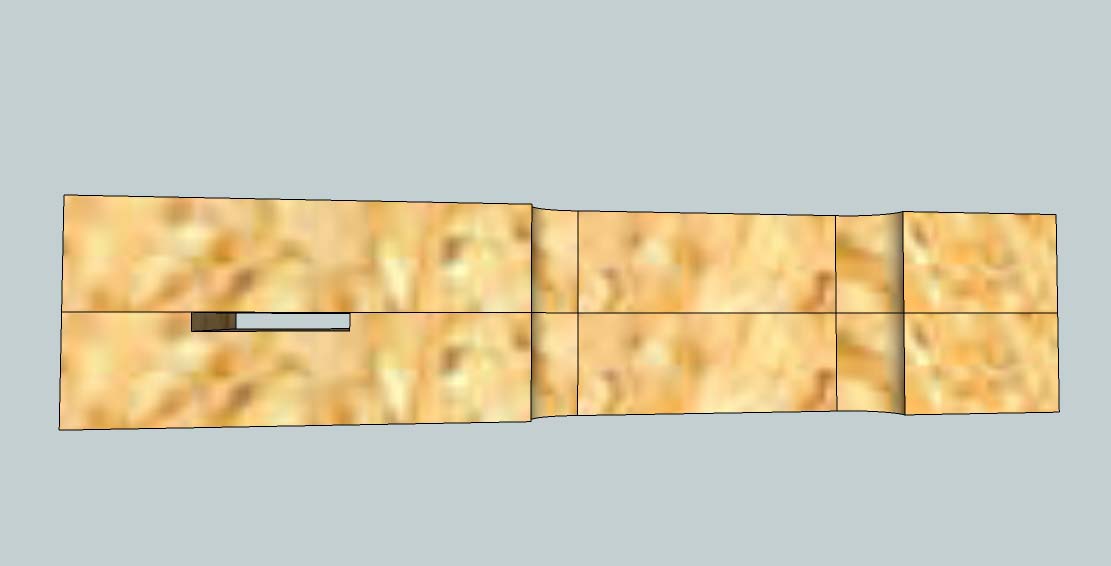
This is what the sides look like. |
This is how each block looks after cutting the groove for the streel guide. |
|
|
Cutting the groove for the cam without a dado blade. |
To make the cams, I glue two pieces of 1/4" ply together. After they dry, I use double sided tape and glue a full size pattern to the ply. |
|
|
I cut each cam out just outside of the lines on the bandsaw. |
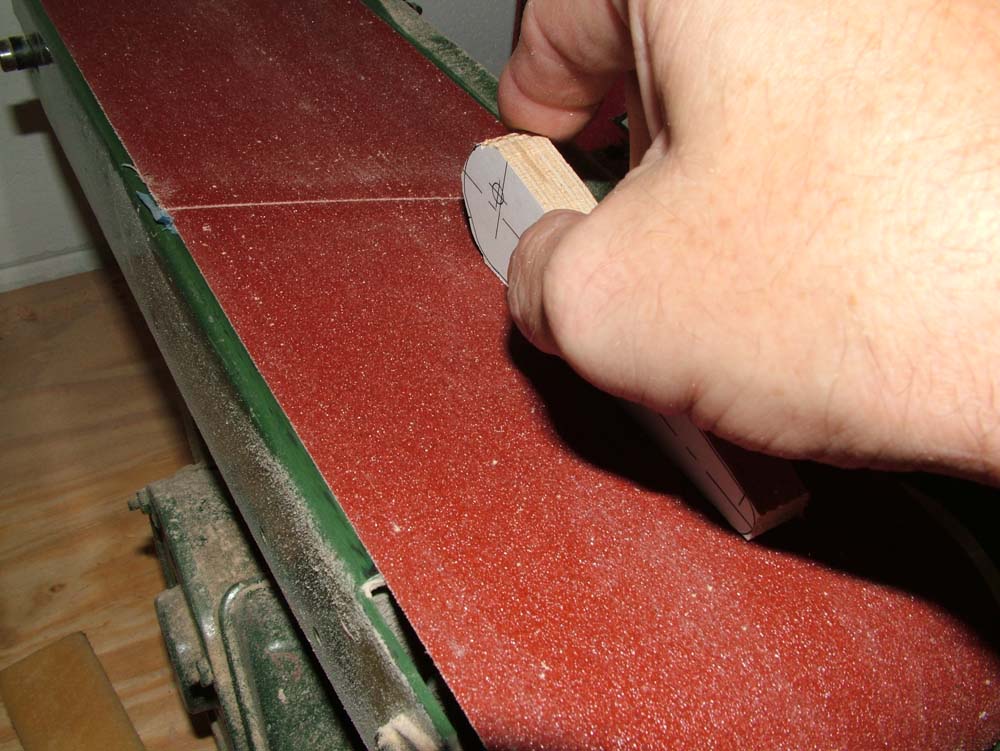
Sanding the cam to its final shape. The flash on the camera makes the sander look like it is standing still. |
|
|
Using a finished cam clamp along with a C clamp to clamp two sides together. |
Another image of the cam clamp at work. |
|
|
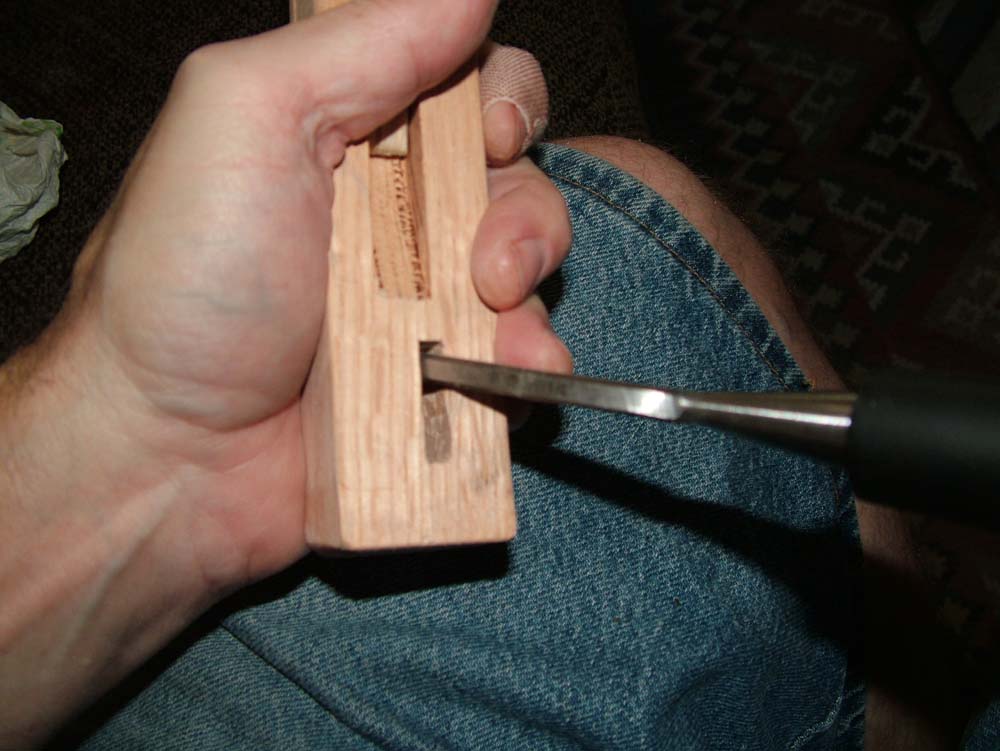
Make sure you get the groove the right size before gluing the sides together. Here, I'm having to chisel it out because it was a little too tight. |
After drilling a 1/8" hole through the clamp block and the cam, I drive a roll pin in to hold the cam in place. |
|
|
It is important to make sure your tools are sharp but I barely dragged my pocket knife across my finger and this was the result. |
|
I set up a little assembly line and built five clamps at a time. This means twenty pieces of 3/4" oak to begin with. Once I cut each
piece 1 1/4" by 7" (or 8" on some clamps - you can make them as longas you want), I clamped all four pieces that make up one clamp and draw a line 1 1/4" from the top and a line 4" from the top. (See Diagram). Then I draw a line 3/8" in from each of those lines. I will drill two holes using a 3/4" hole saw along these lines. After I drill the holes, I take each piece to the band saw and cut out between the holes. The next thing I do is take one of the sides and cut the slot for the steel rail. I first started cutting half of the cut in both the left and right sides of the front and back parts of the clamp but that is too time consuming. Now, I just cut one slot in one half of each side. You will see what I am talking about in the illustrations. Measure up 3/4" from the bottom of the clamp sides and then draw a line one inch above that for the notch we are going to cut. Set your table saw height the same as the steel guide you are using. If you have a dado blade, this is a good time to use it. I don't have a dado blade so I cut at both lines and then slowly cut in between each line until I have the notch cut into the wooden block. Be sure when you cut the notch on the other side block that you cut it on the same side as the one you just did so your clamp won't be crooked. When you have the notch cut in both sides of your clamp, go ahead and glue and clamp both parts of the front and back of your clamp and allow to dry. Slide the metal guide into the fixed end of the clamp and drill two 1/8" holes diagonally and then hammer in roll pins to hold the guide in place. Now take your sliding piece of the clamp and cut a notch with your bandsaw about 3/16" from the inside of the clamp. Cut down 4 1/2" and then drill a 1/8" hole at the bottom of the cut to keep the wood from splitting.
|


