Thickness Sander
Page 9
Page 1 2 3 4 5 6 7 8 9
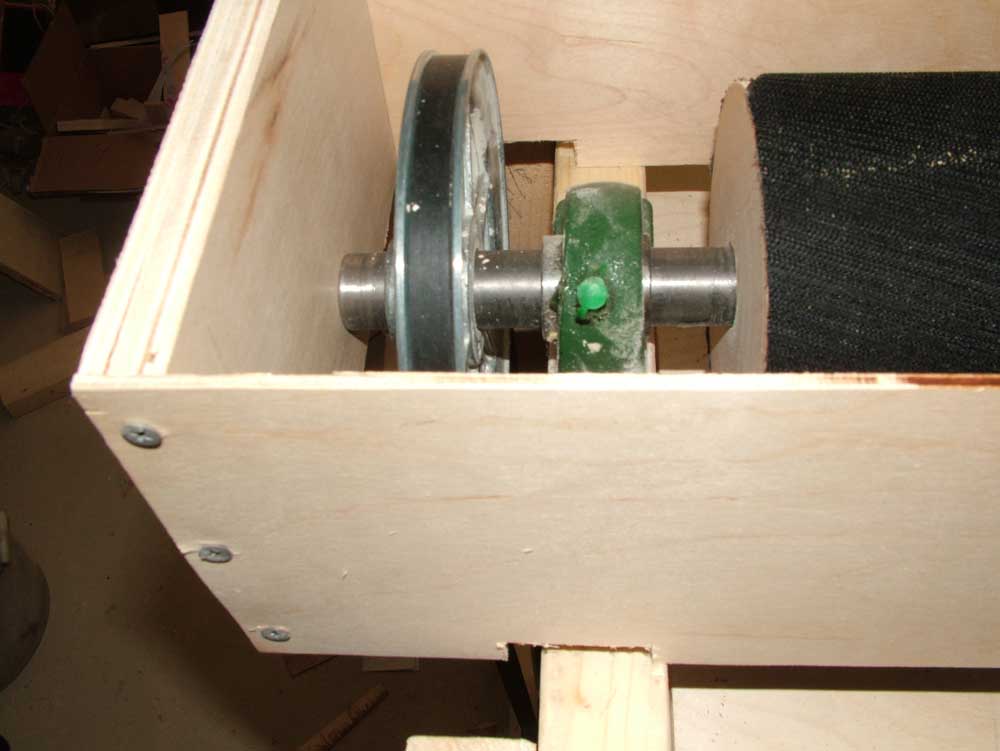
The dust hood is finished! When I measured for the first dust hood, I had not taken into account that I put a 6" commercial pulley on the sander instead the building a 5" plywood pulley like what is shown on the plans. This dust hood is deeper and taller to make room for the pulley. Not only does it collect dust while sanding but it also makes a protective covering for the pulley. The way the sander is built, I could also put a piece of 1/8" plywood on the side to make a safety shield for the belt but I don't feel like I need it. If I had other people using the sander, I probably would use one just for the liability.
I didn't measure quite right where the hood fits over the sander's frame. I wanted to cut a one half inch deep cut to fit over the frame and I just eye-balled the front and back and sure enough, got it wrong. So, instead of making a new front and back, I made some quarter inch patches. This worked very well and covered up my mistake.
When I started the sander, the vibration make the hood slide to the back, causing it to hit the sanding drum. To fix this, I cut some blocks out of a scrap piece of two by four and screwed them in place. This makes the dust hood hold more tightly.
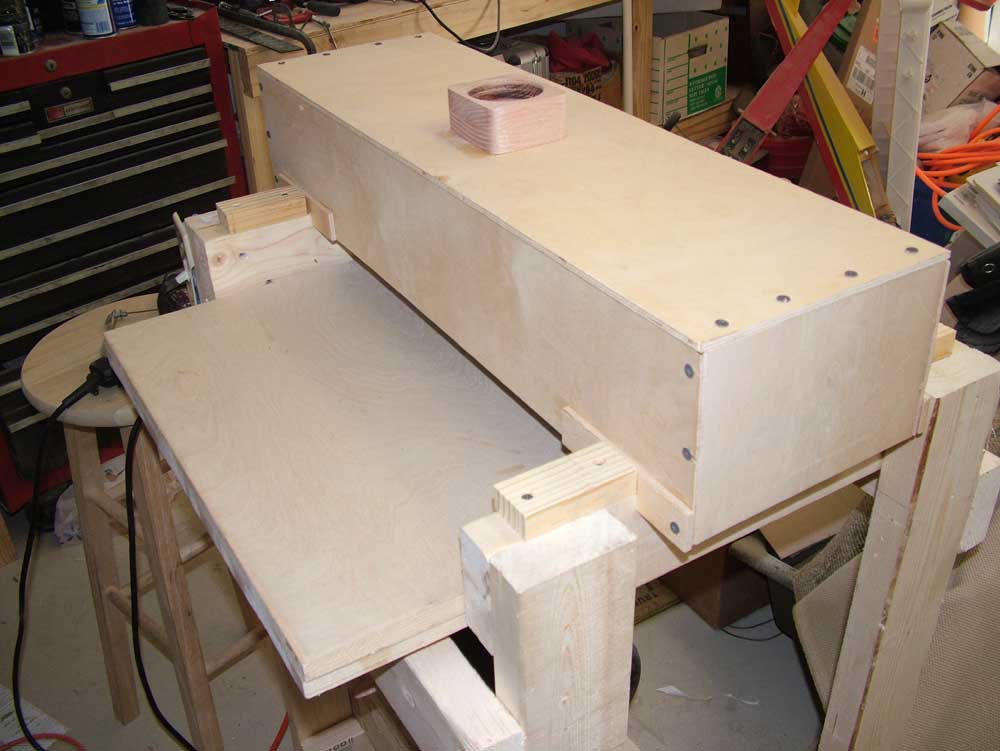
Everything is done except for covering the table with laminate flooring. This allows the wood to slide into the sander more easily since the laminate flooring is pretty slick. The other thing I have to finish is the hole for the shop vac hose. The hole saw I used is just over an eighth of an inch bigger than the end of my shop vac's hose. To fix this I cut some 3/8" strips of wood and glued them in place, lining the hole. Now the hole is just smaller than the hose end so I will use my oscillating spindle sander to sand the hole to an exact fit.
|
|
I didn't measure quite right so when I started putting the dust hood together, the notches that fit over the frame were off. I made some patches as shown in the next photos to cover my mistake instead of cutting a new front and back. |
You can see the patches I made where the hood sits on the frame. With the sander running, vibration moves the hood so I put some wood blocks to hold it in place. |
|
|
Another shot of the wood blocks to prevent the hood from vibrating out of place. |
A photo of the finished sander. I have finish shaping the hole for my shop vac hose to plug in the top and then get a piece of laminate flooring to put on top of the table to make it smoother when inserting wood. Other than that, this is a complete sander. |
I am pretty excited about this sander. It really is easy to build and should do a great job. Anyone with even just a little bit of woodworking experience should be able to tackle this project. And for sure, if you are going to build a guitar, you can do this. It will save you a lot of money over a commercially available thickness sander. A special thanks to Pat Hawley and Matthias Wandel for sharing their knowledge and information on this sander!
|