Thickness Sander
Page 6
Page 1 2 3 4 5 6 7 8 9
Today, I got out and reduced the size of circular disks I've cut for the thickness sander. To do so, I just loosen the wingnuts on the circle cutting jig to get the desired radius. I left the disks just proud of 5" so when I "true up" the disks, the sanding will take them close to the desired 5" diameter. I used a 1/2" wide blade on my band saw and made multiple cuts to get the shape of the disks. By spraying some silicon spray on the band saw table and wiping it off, it allows the circle cutting jig to slide back and forth smoothly and quickly. I've included photos of the finished result.
I went to Ace Hardware today and bought some 1/2"x2" carriage bolts, flat washers, lock washers and nuts to mount the motor. I wasn't sure what size of bolts to get to mount the pillow bearings. I came home and measured the holes and they are 1/2" diameter. I looked at the "Power Tools and Accessories" thickness sander and they don't tell what size bolts they use to mount the pillow blocks. It would be my guess that Pat Hawley based his thickness sander on this design. I think I will use lag screws to hold the bearings in place. If I have trouble with the bolts vibrating loose, I can always drill the holes all the way through the 2x4 braces and use bolts with lock washers.
|
|
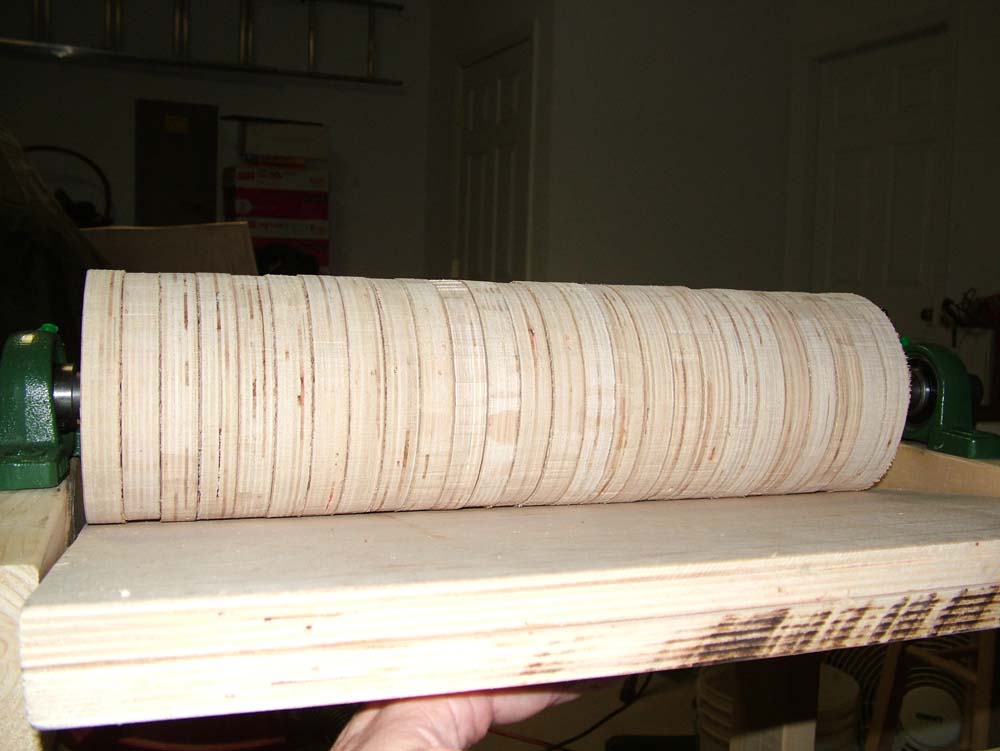
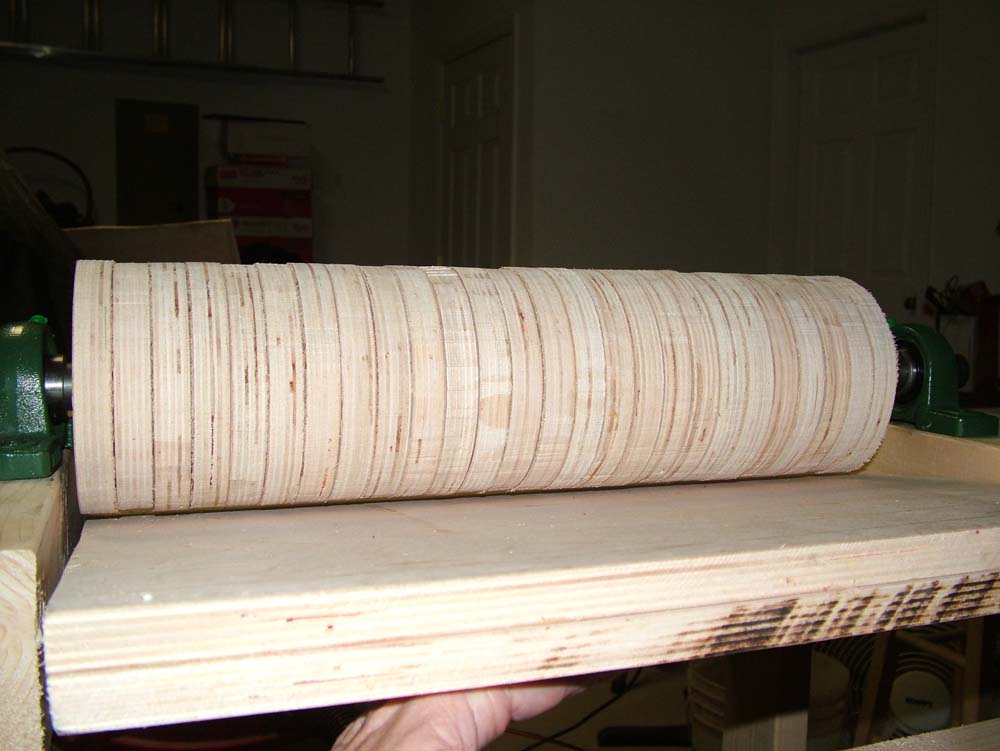
You can see that the disks that make up the sanding drum are very close to the same size. When I "true up" the drum, there won't be a lot of sanding that has to be done. |
By holding the sanding table up to the bottom of the drum, it shows just how evenly the circular disks are rough cut. |
|
|
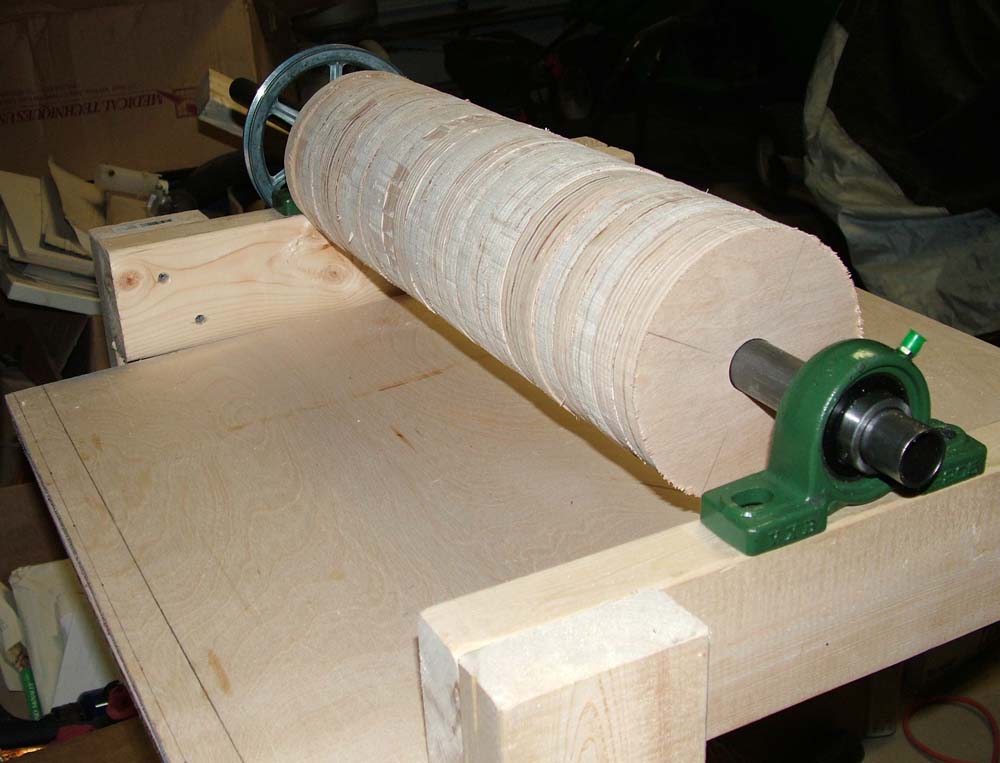
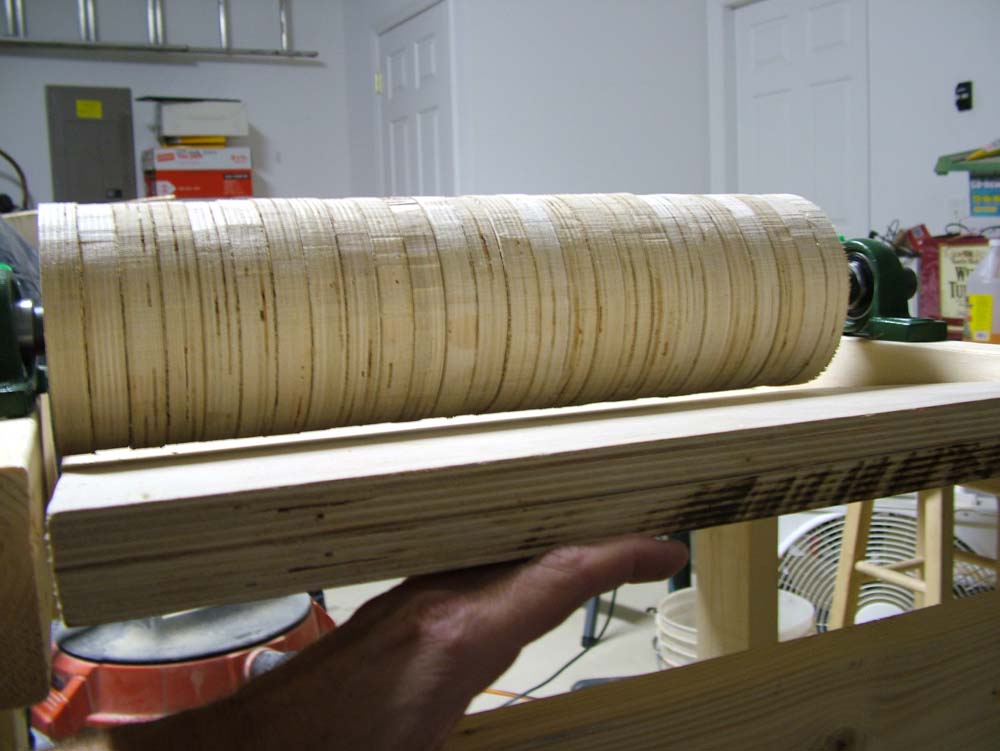
The pillow bearings are not bolted down yet and the drum shaft will be cut to the correct length when the motor is mounted and the drum is ready to be "trued up". |
My circle cutting jig does a pretty good job of cutting the disks to almost the exact shape. This will save a lot of sanding when "truing up" the drum. I'm all about saving work and making things easier. |
|
|
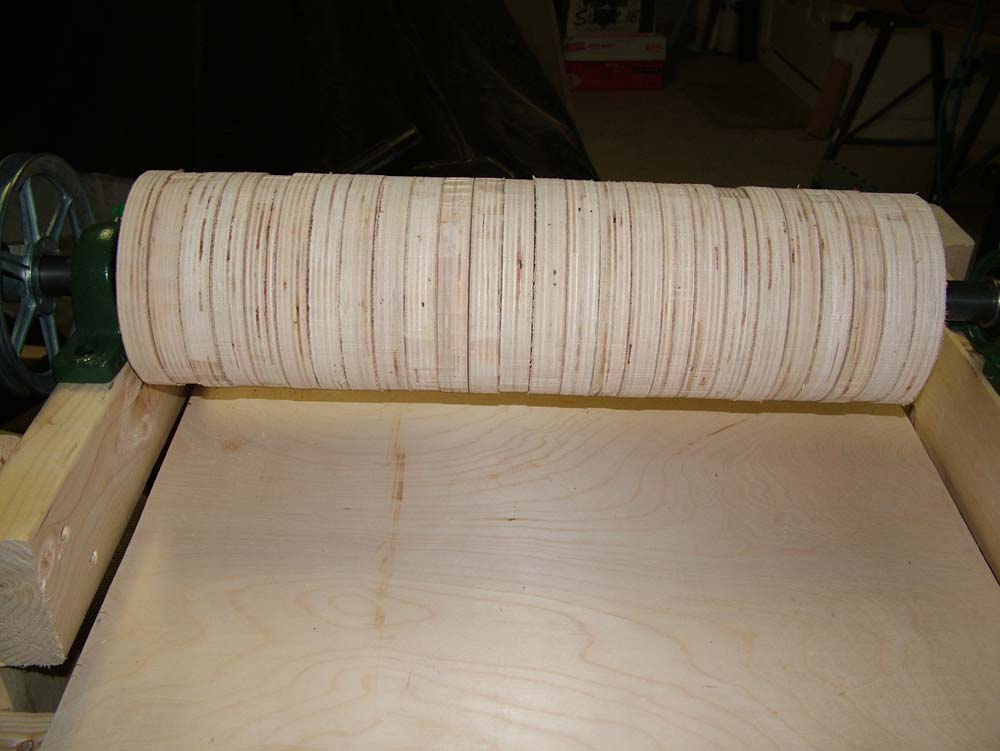
| Another view of the unfinished sanding drum. |
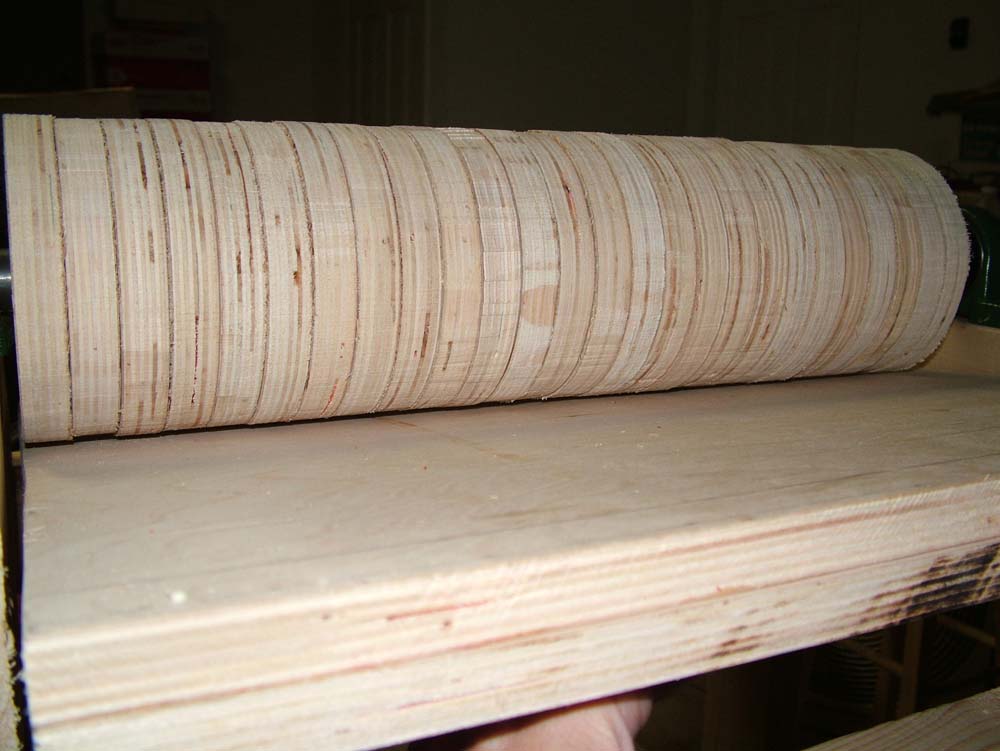
Another view. |
|
|
This sander is very easy to make but ended up costing about twice what I had calculated beforehand. It still ended up costing much less than a commercial model.
|
|
Tomorrow, I plan on getting the lag screws to mount the pillow bearings and I also plan on mounting the motor. I need to purchase a light switch for the on/off switch and some wire to wire the motor and switch and to make the electrical cord. I will also need a three prong, grounded wall plug.
The plans call for laminate flooring on top of the sander table. I don't have acces to laminate flooring and I don't want to buy a whole package. I am thinking about cutting a piece of 1/4" plywood the same size as the table. Then I will seal the grain and paint the plywood. After that, I'll wax it to make it smooth and slick. The purpose of the laminate flooring is to make sure the wood you are sanding will slide easily into the sander. I think the painted and waxed plywood will be just as good. I will use countersunk wood screws to mount the plywood so it can easily be replaced.
To determine the size of the V-belt I need, I will use a piece of string wrapped around both pulleys. Then I'll take a trip to a local auto parts store to find the belt.
I still need to trim the sander table. I will probably do that tomorrow. To hide the seam where the two pieces of 3/4" ply is glued together I am thinking about gluing and nailing some wood on the face with mitred cuts on the edges. It will make the table look much nicer.
To finish the table, I will need to insert a 1/8"x3/4"x1 1/2" steel into the bottom of the table where the adjustment screws makes contact. I will drill a hole for the 1/2"x8" table adjustment screw. The "Power Tools and Accessories" thickness sander has a nice adjustment lock on their adjustment screw. I may attempt something like this to insure that the table does not shift duing sanding operations. I can't imagine sanding an expensive piece of wood and getting right down to the final pass through the sander and something slips, destroying the piece of wood!
I will need to build the dust hood. This is an important part of the sander. Without it, I can just imagine more saw dust all over my garage than I already have! I have already drilled the correct size hole in two pieces of 3/4" oak to mount on top of the dust hood. The shop vac hose will slip into the hole and will be used to suck up the sawdust during sanding operations. I installed the horizontal leg braces with wheels to make the sander more stable and easier to move. I think I am really going to like that addition and it only took a few minutes to do it.
Parts I need to pick up tomorrow:
- 1 - 1/2"x8" bolt for table height adjustment.
- 4 - 9/16" (or suitable) lag screws for pillow block mounting.
- 1 - Light switch and mounting box.
- 10 feet of electrical wire.
- 1 - 3 prong, grounded plug.
- 1 - V-belt ? diameter.
- 1/8" or 1/4" poplar or similar wood for facing on sander table.
- 1 - 1/4"x2 1/2" screw for motor mount.
One problem I will have to address is that the holes in the disks are just a little bigger than the drum shaft. I think I will purchase some cloth, medical tape and put that over the length of the shaft where the disks will go so they fit snuggly.
I will update the Excel Spreadsheet after I get these parts. Other than some paint, and sandpaper, this should be all I need to complete the sander! |